 So, we got a couple of kayaks a while back. After a bit of research, and not a little advice from experienced yakers (that’s slang for kayakers… I’m trying to learn the lingo) we decided on Wilderness Systems’ Tarpon 140 for the Mrs. and a Ride 135 for me. Both are set up specifically for fishing, but I’ll get more into a full review of them later.
First, we had to add rudders. When your hands are full with a fish on the line, you need a way to steer. Large fish, especially salt water fish, can easily tow you and your kayak and it’s important to keep the bow pointed at the fish so as not to get tipped over (which is generally considered to be a “bad thing” when the fish on the line is a 6-foot shark) and tossed into the water with the fish you’re fighting. Rudders help keep you pointed at the fish, and they also make it easy to steer while drifting the flats.
After getting the Harmondy Rudder kits, I realized the instructions were completely useless. They try to address EVERY make and model of kayak, and every installation variation that might exist, and the resulting mess, which is completely devoid of pictures, is more hindrance than help.
Here then is a rough step-by-step how-to guide for installing the Harmony rudder system onto a Tarpon 140 or Ride 135.
Click on any of the images for a full-size version. (Also, if you’re going to hotlink to my images, and I know you are, at least do me the courtesy of throwing an actual link up to this article.)

Step 1: throw away the instruction manual. It really is completely useless.
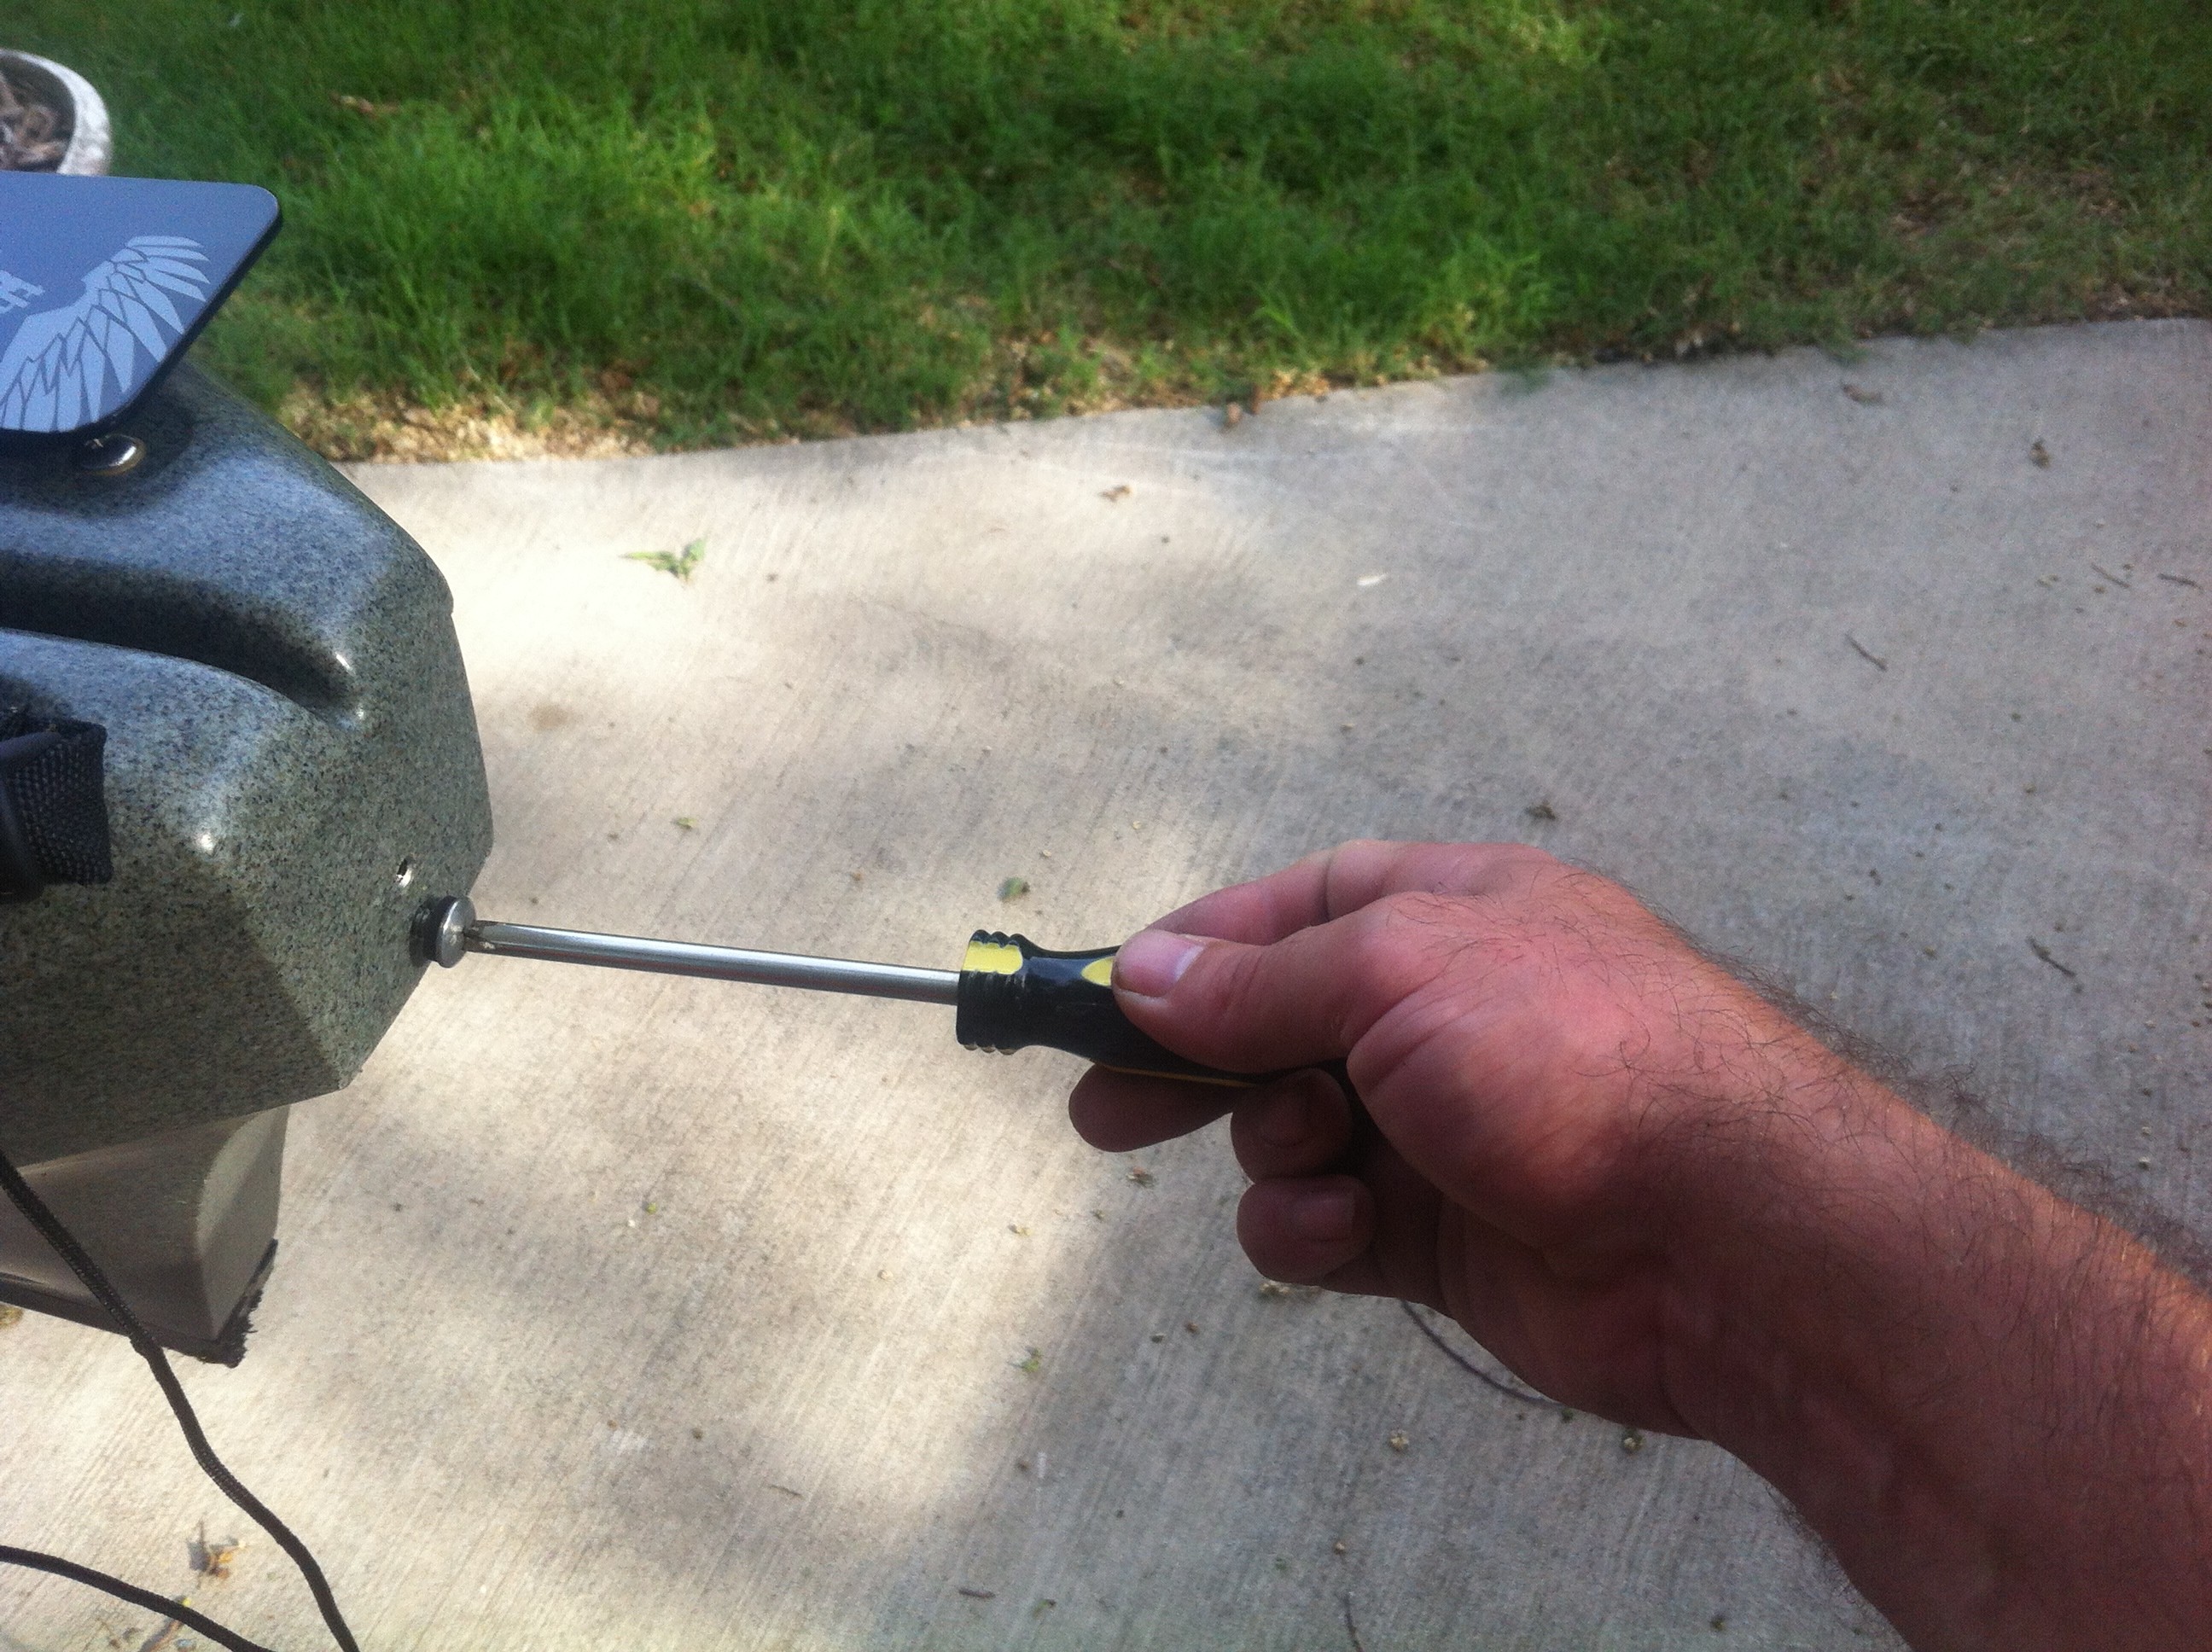
Step 2: Remove the two bolts from the stern.
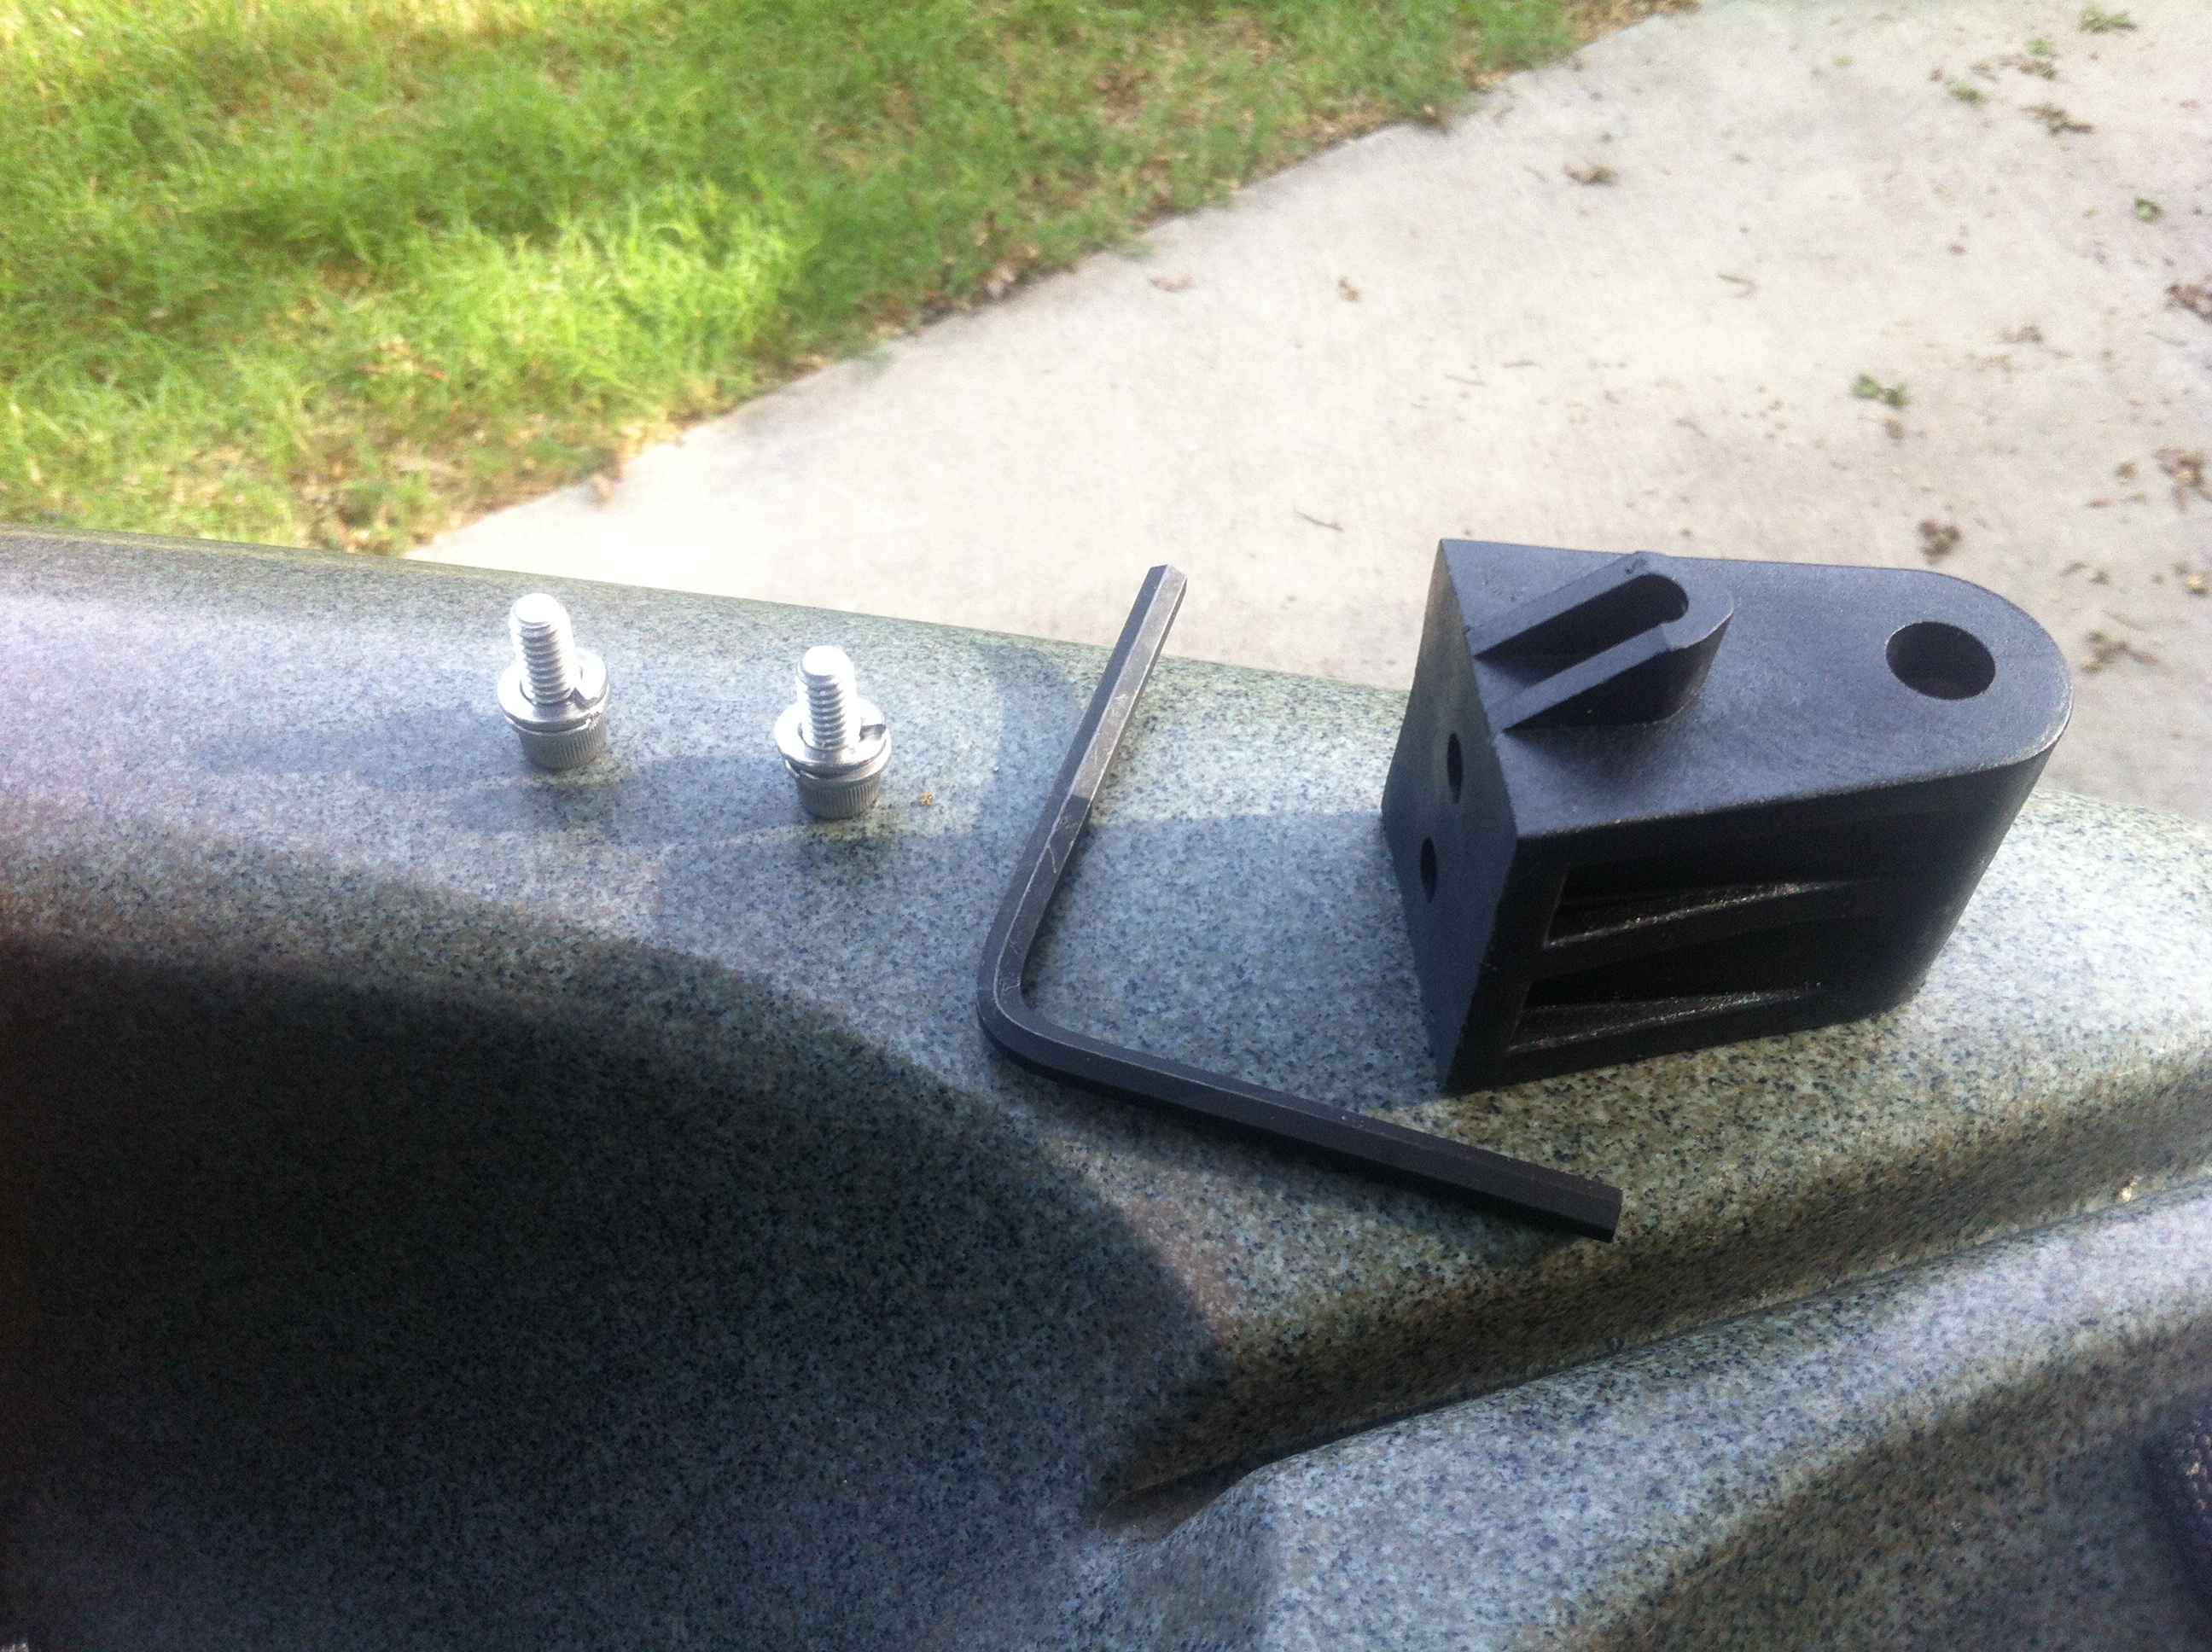
Step 3: put two locking washers on each hex bolt, and position the rudder mounting bracket with the blocking tab facing upwards.
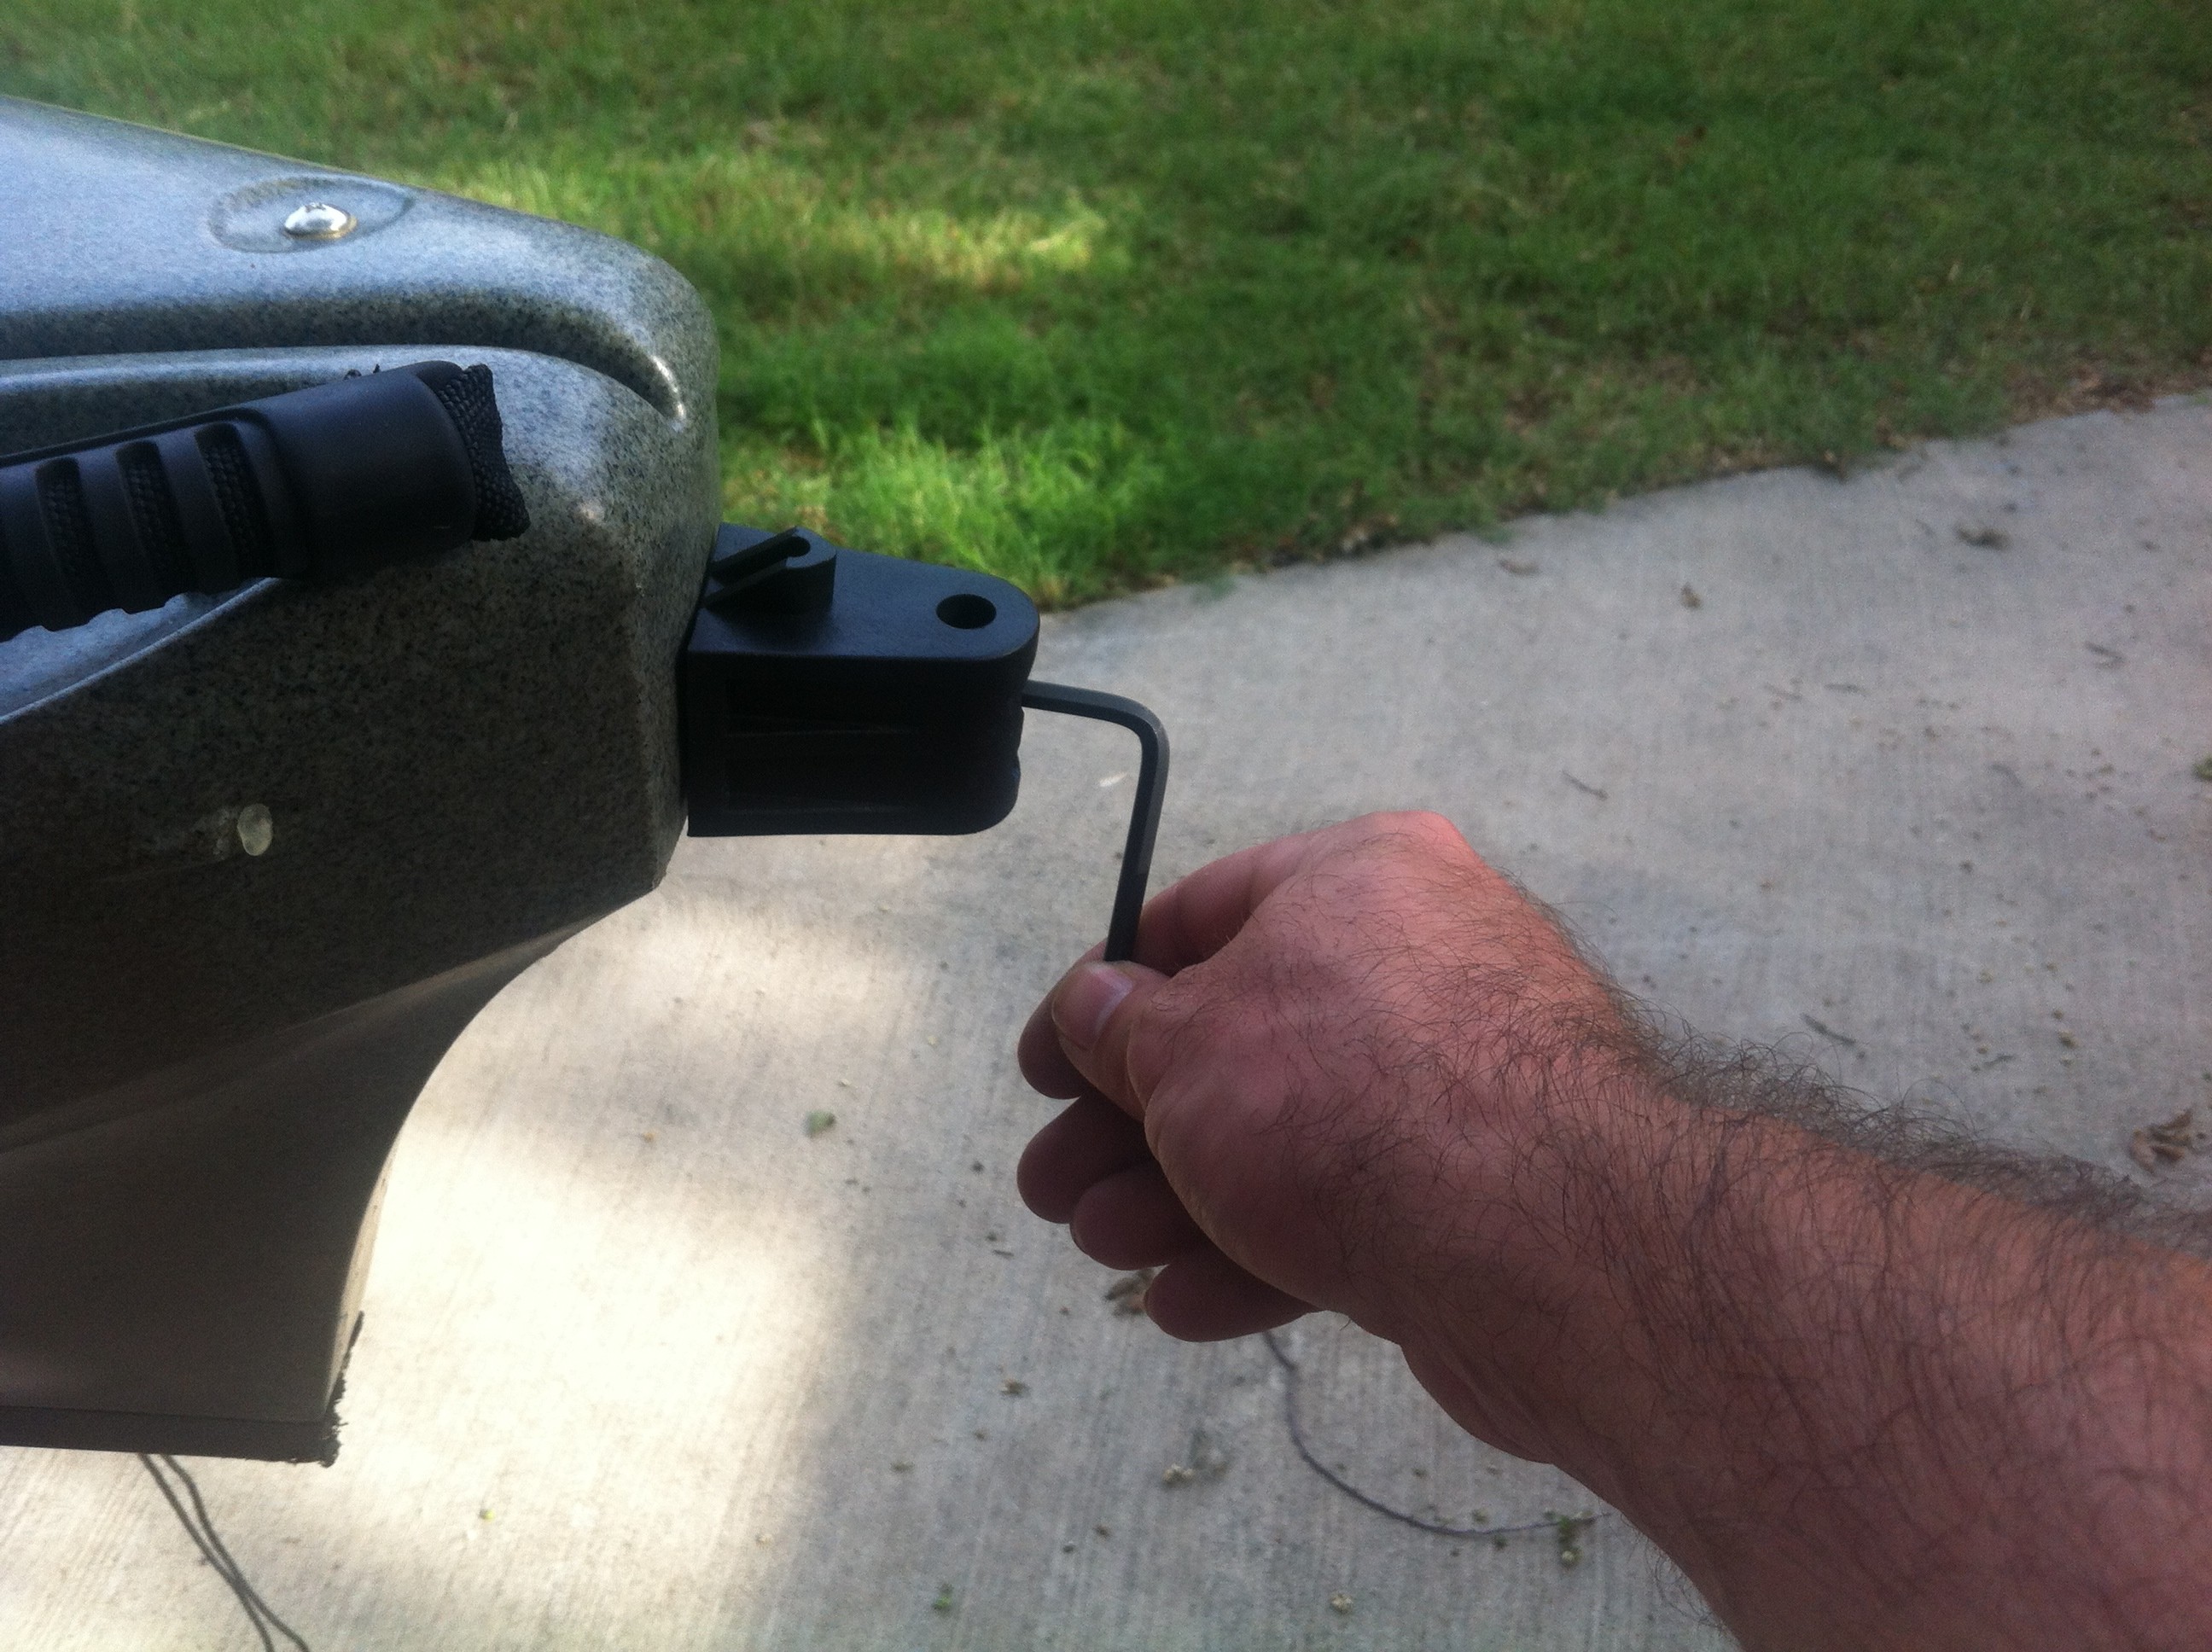
Step 4: Snug up each bolt, but do not tighten. After they are barely snug, then tighten them up alternating between each bolt.
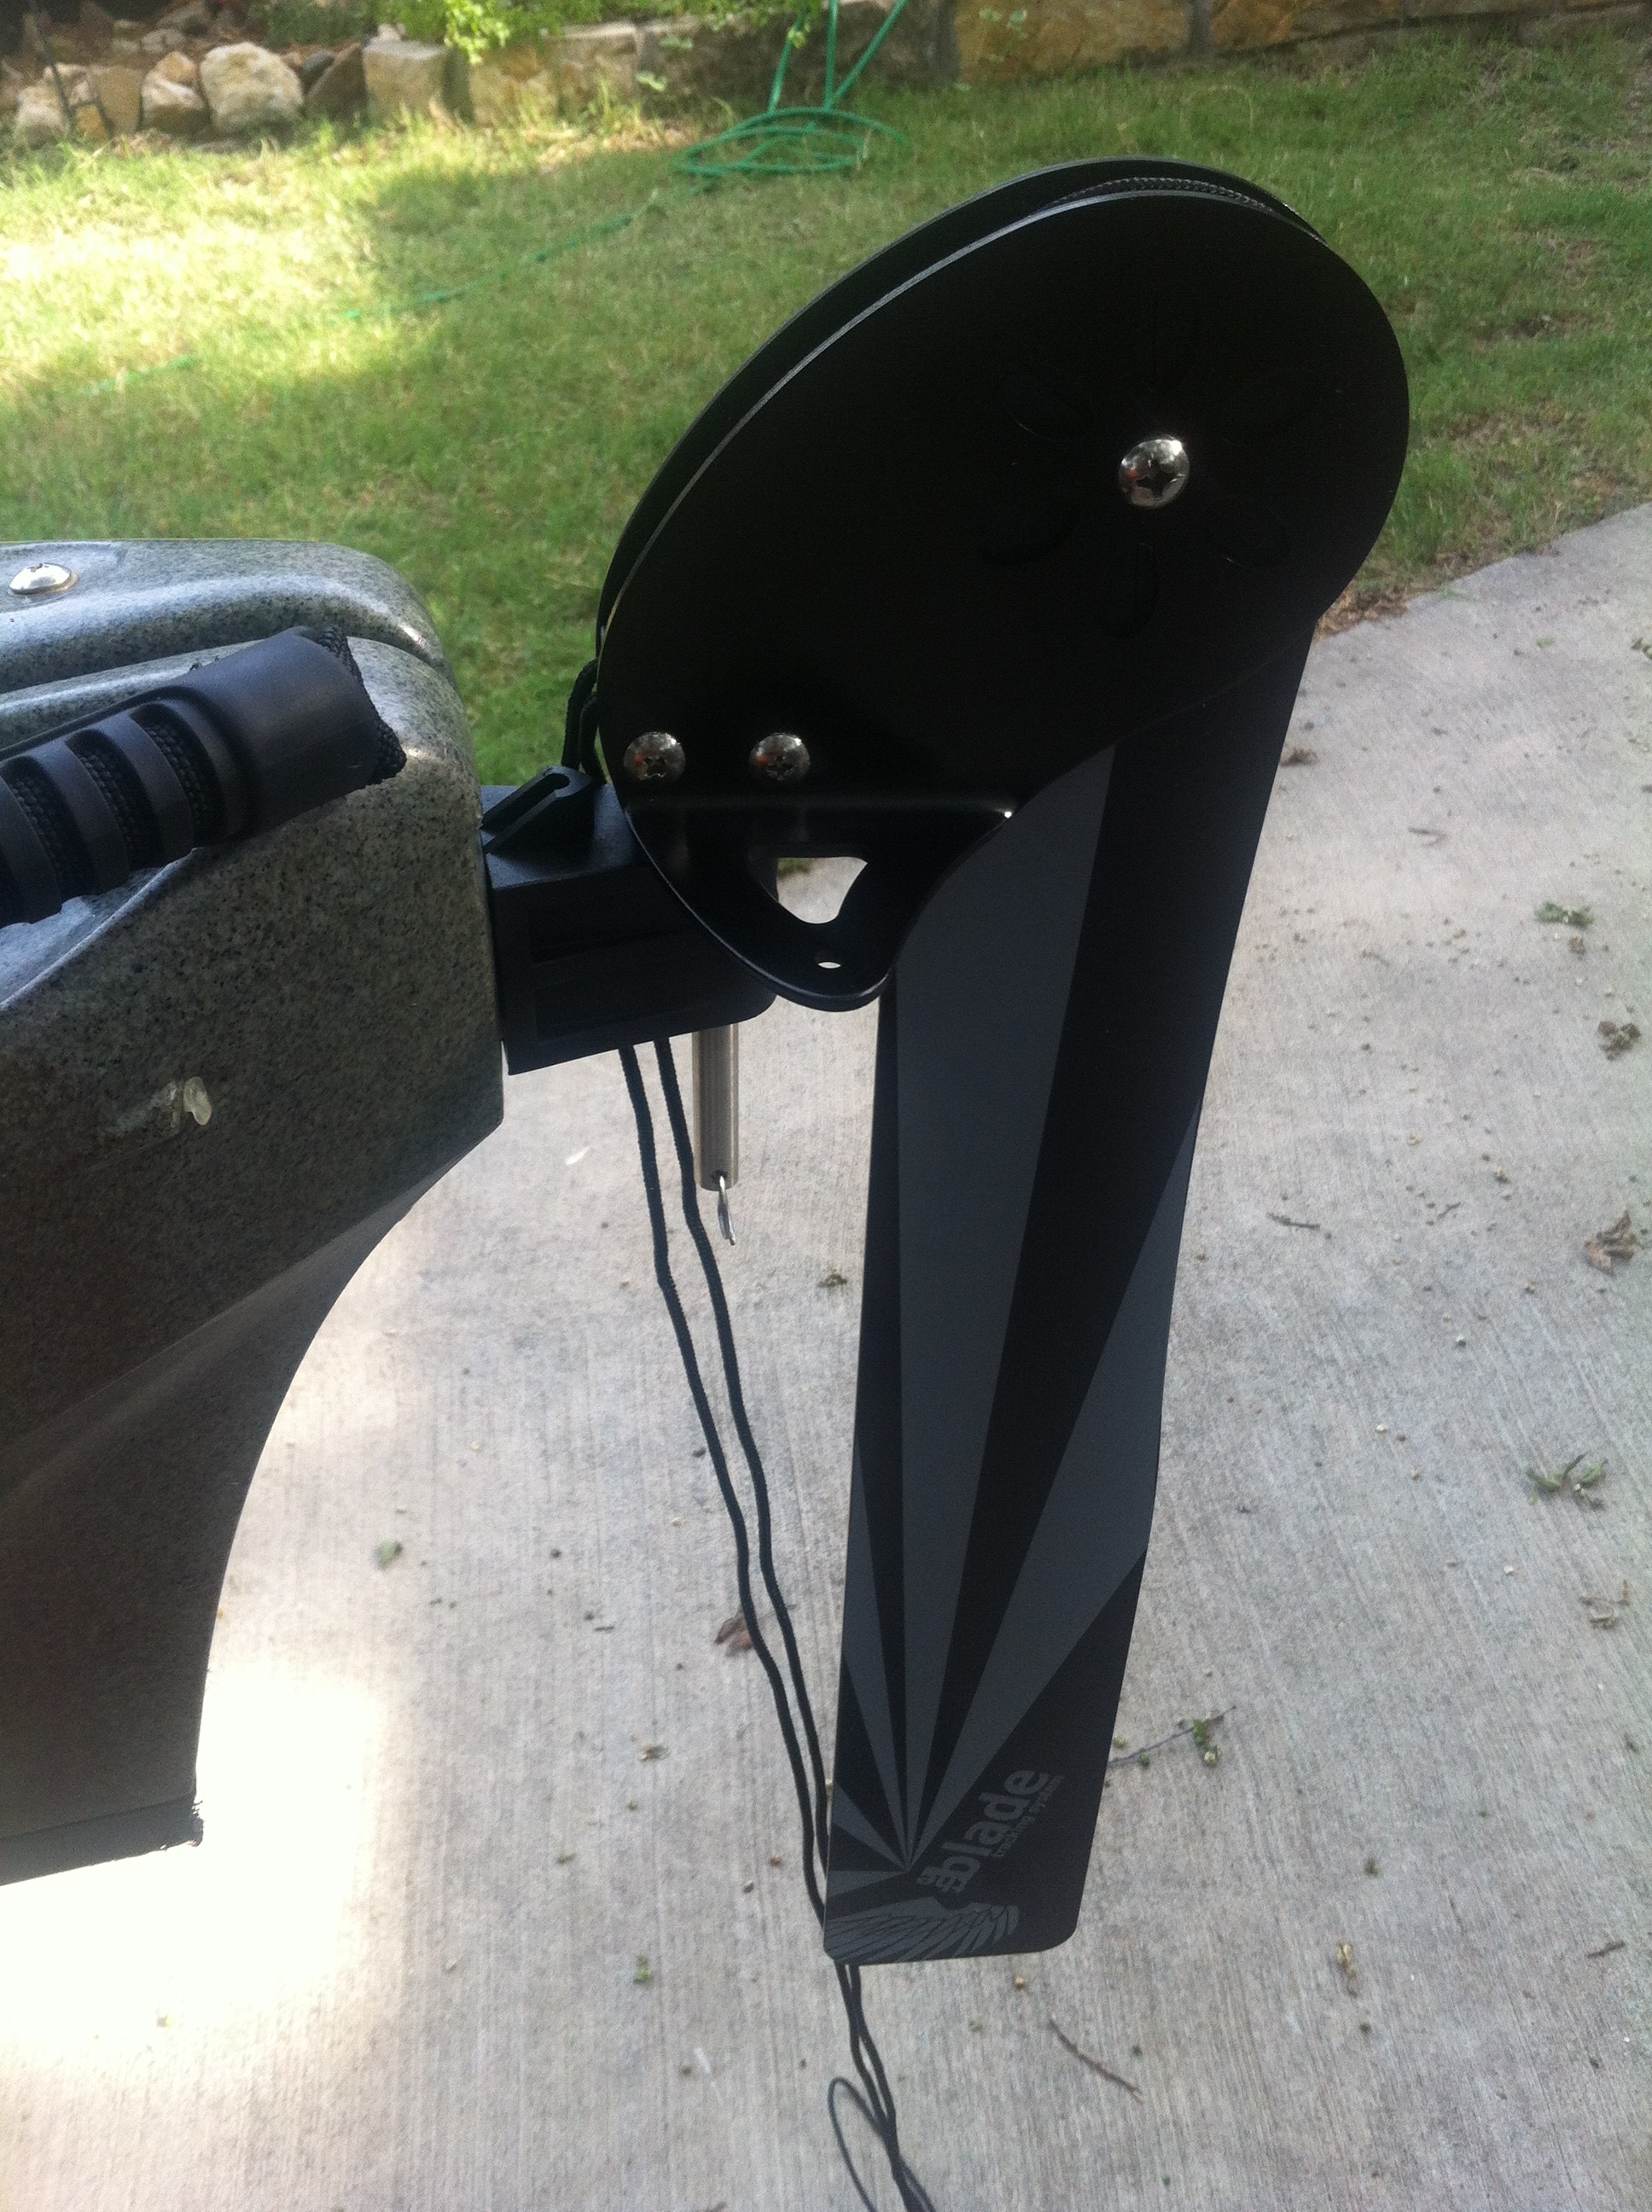
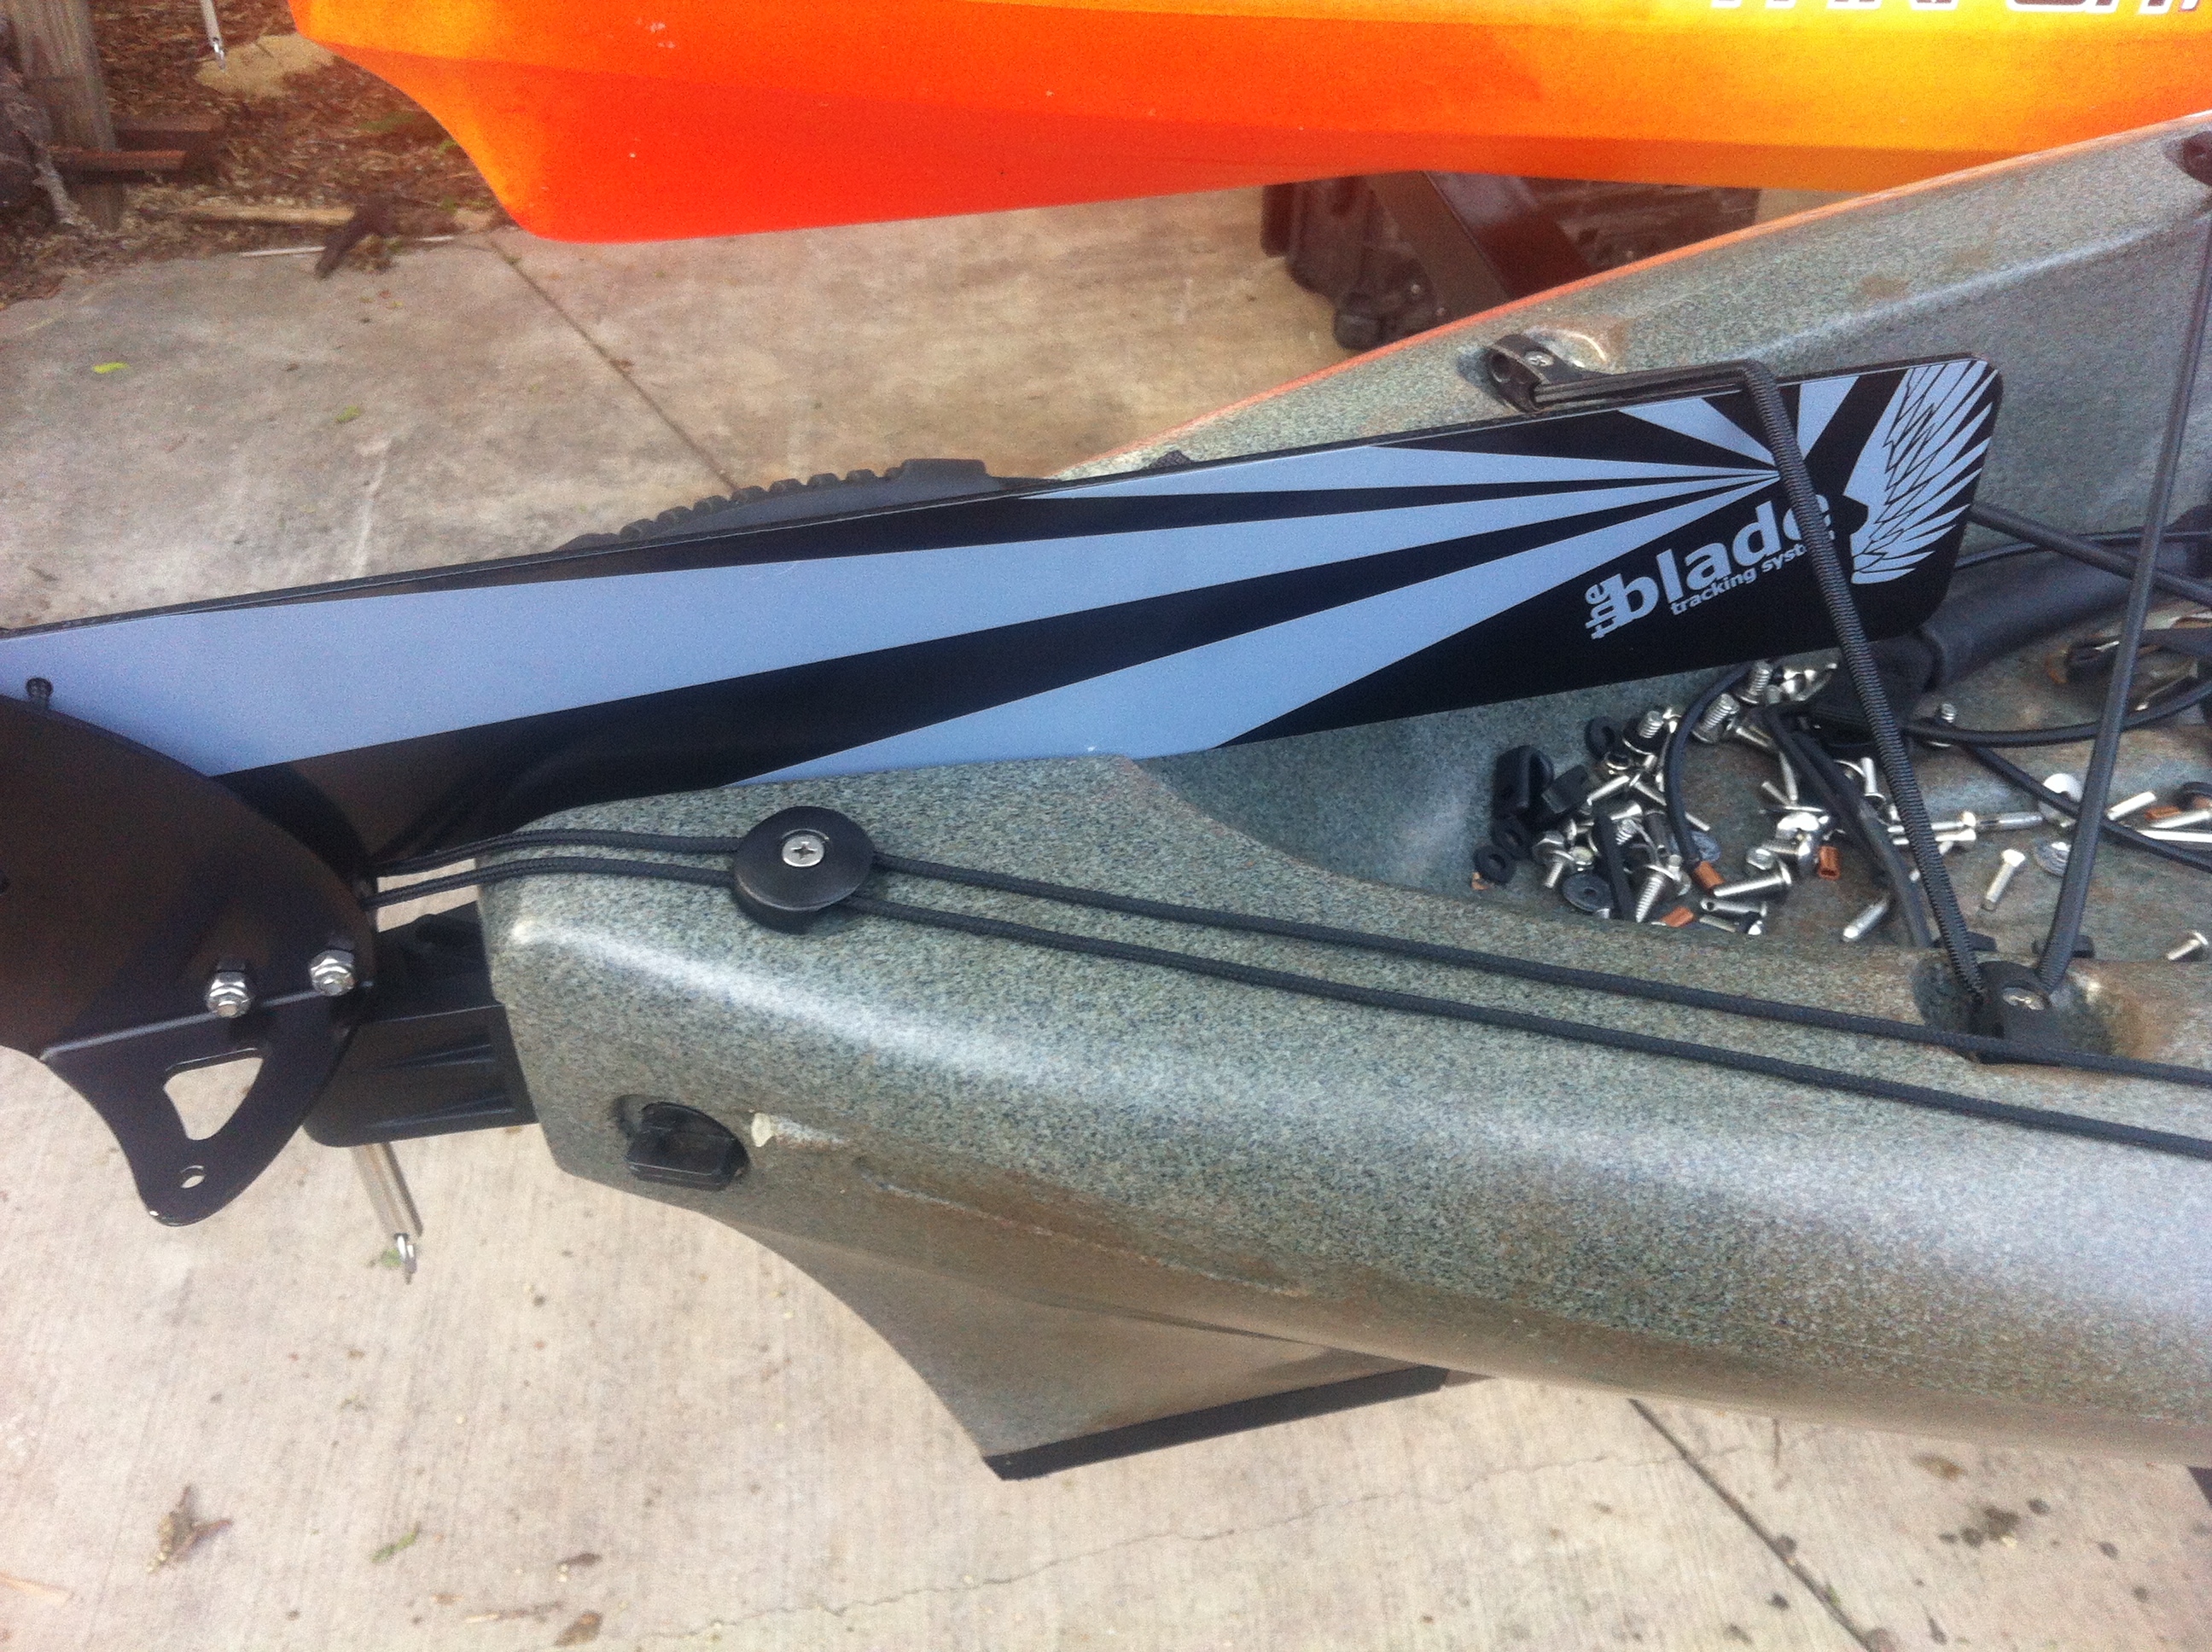
Step 5: Insert the rudder assembly into the stern mounting bracket.
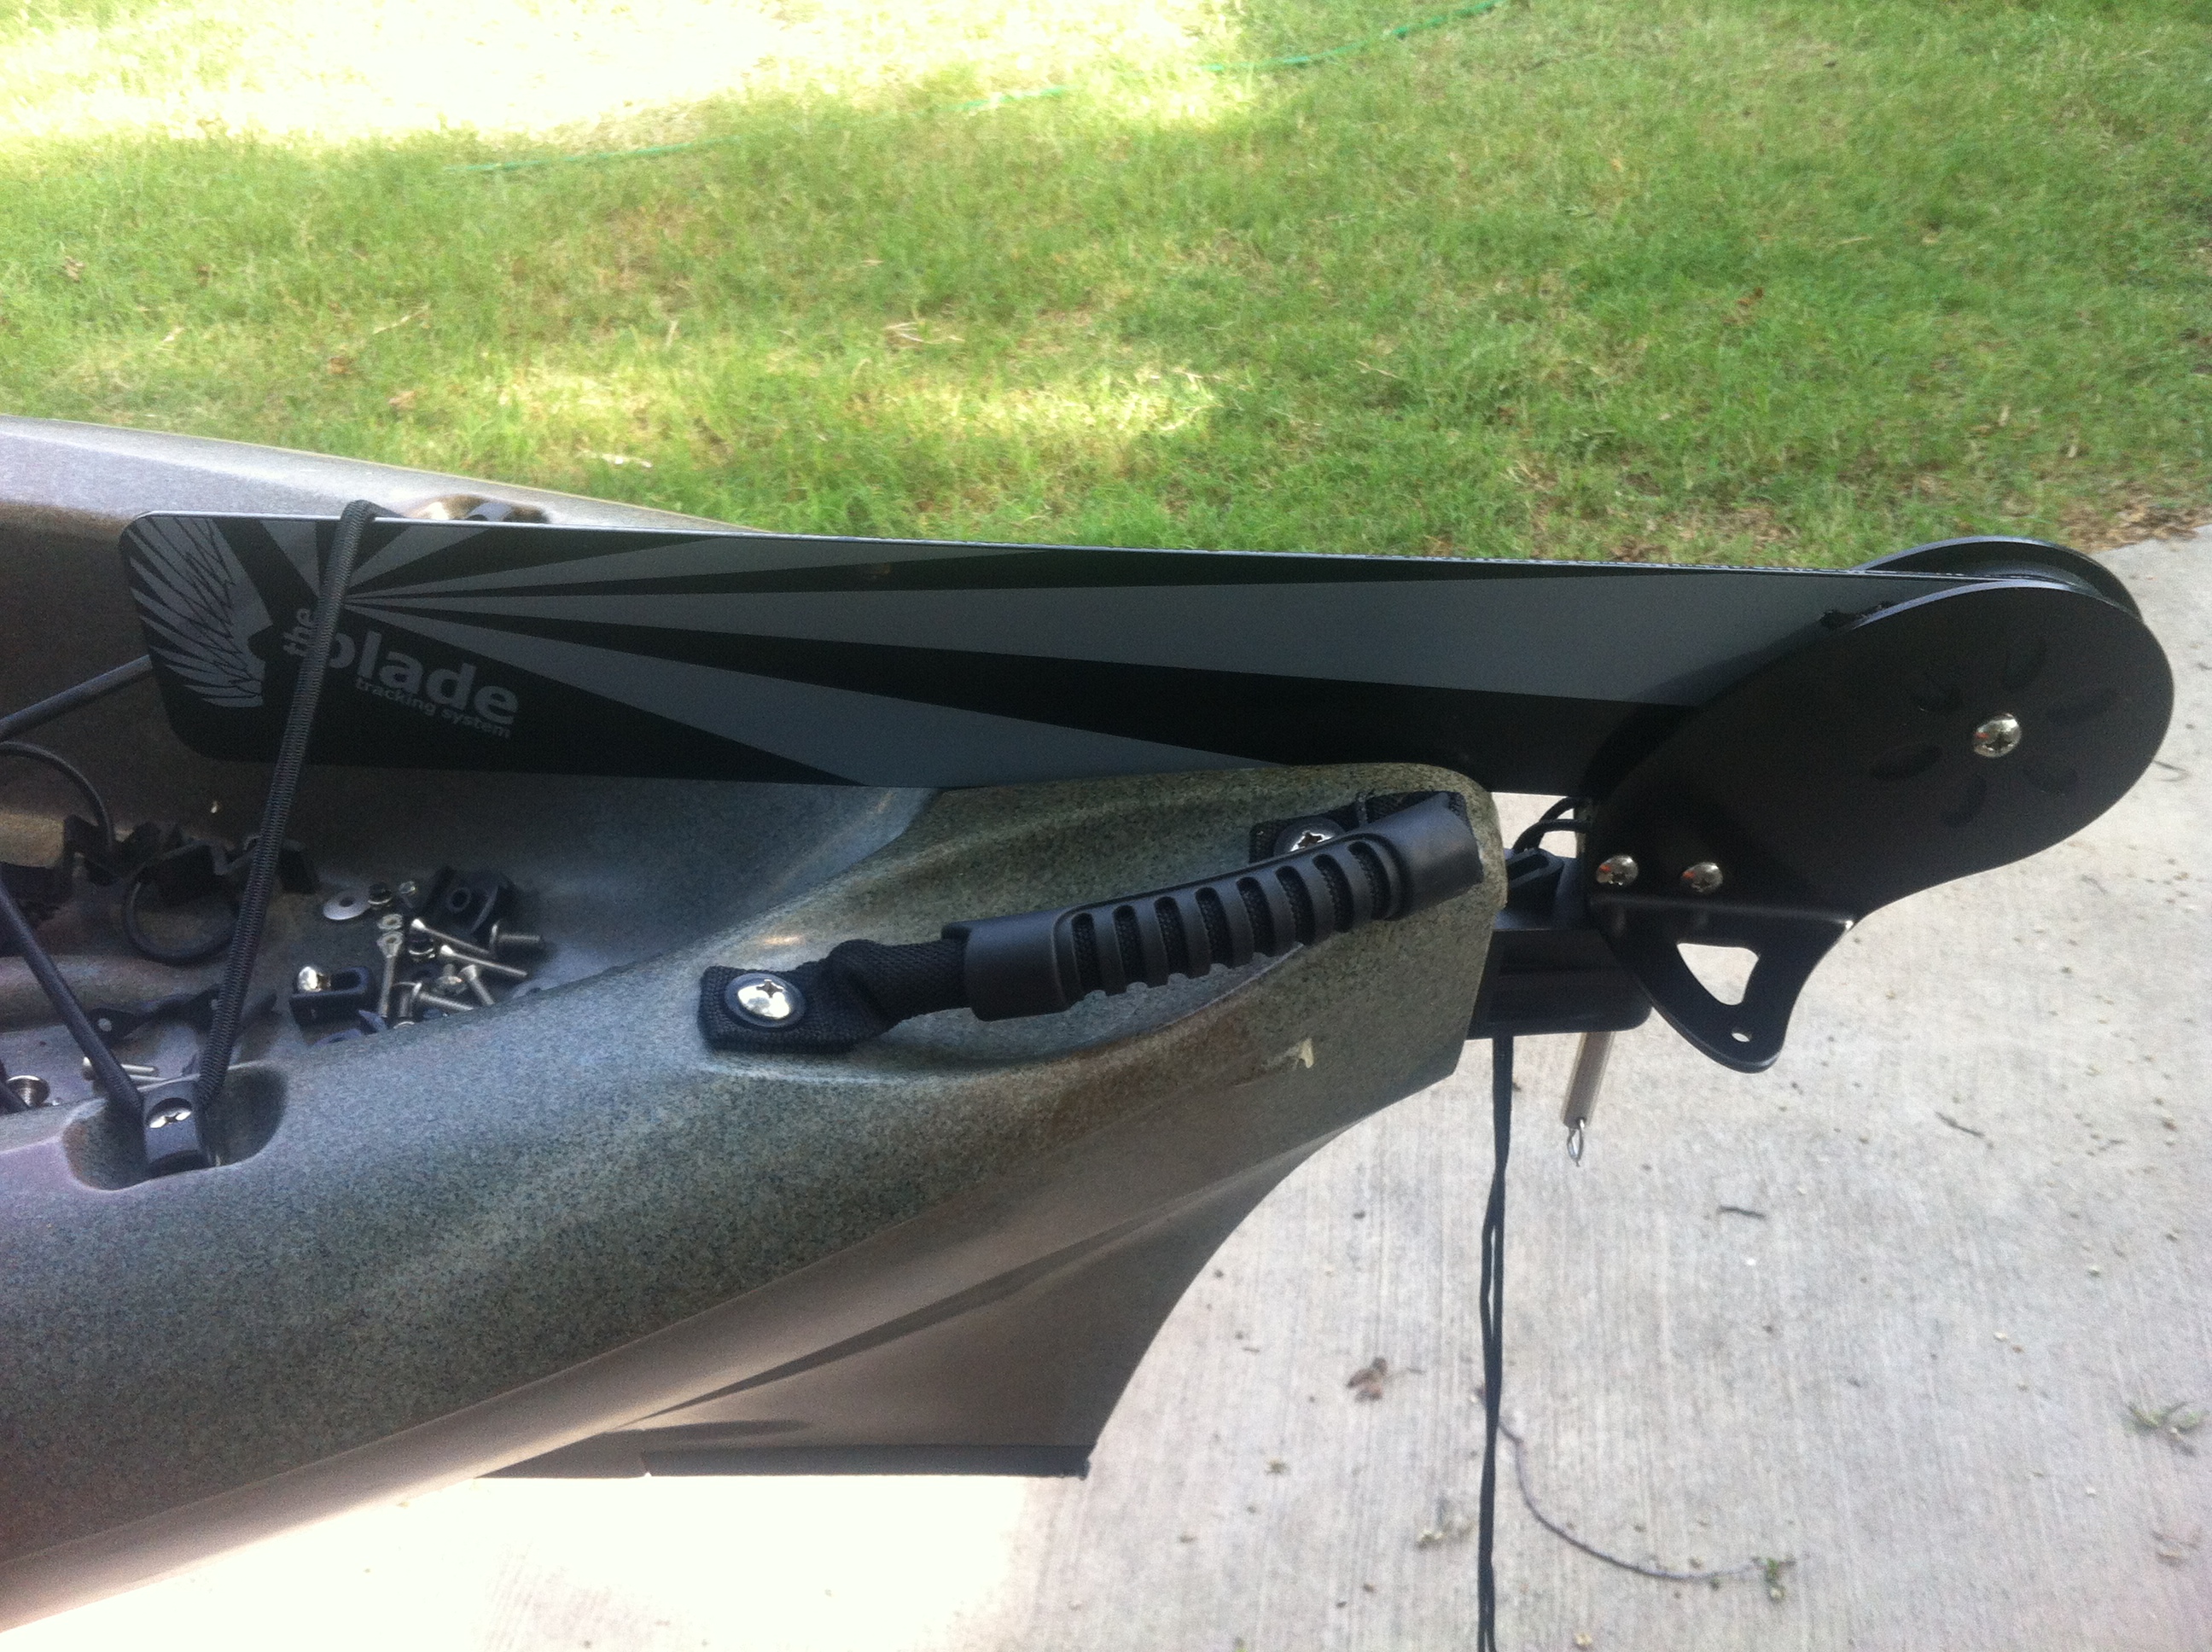
Step 6: Secure the rudder using the bungee cord (if you’re installing on a Tarpon 140, replace the rear carry handle with the one with the attached bungee which is included with the kit.
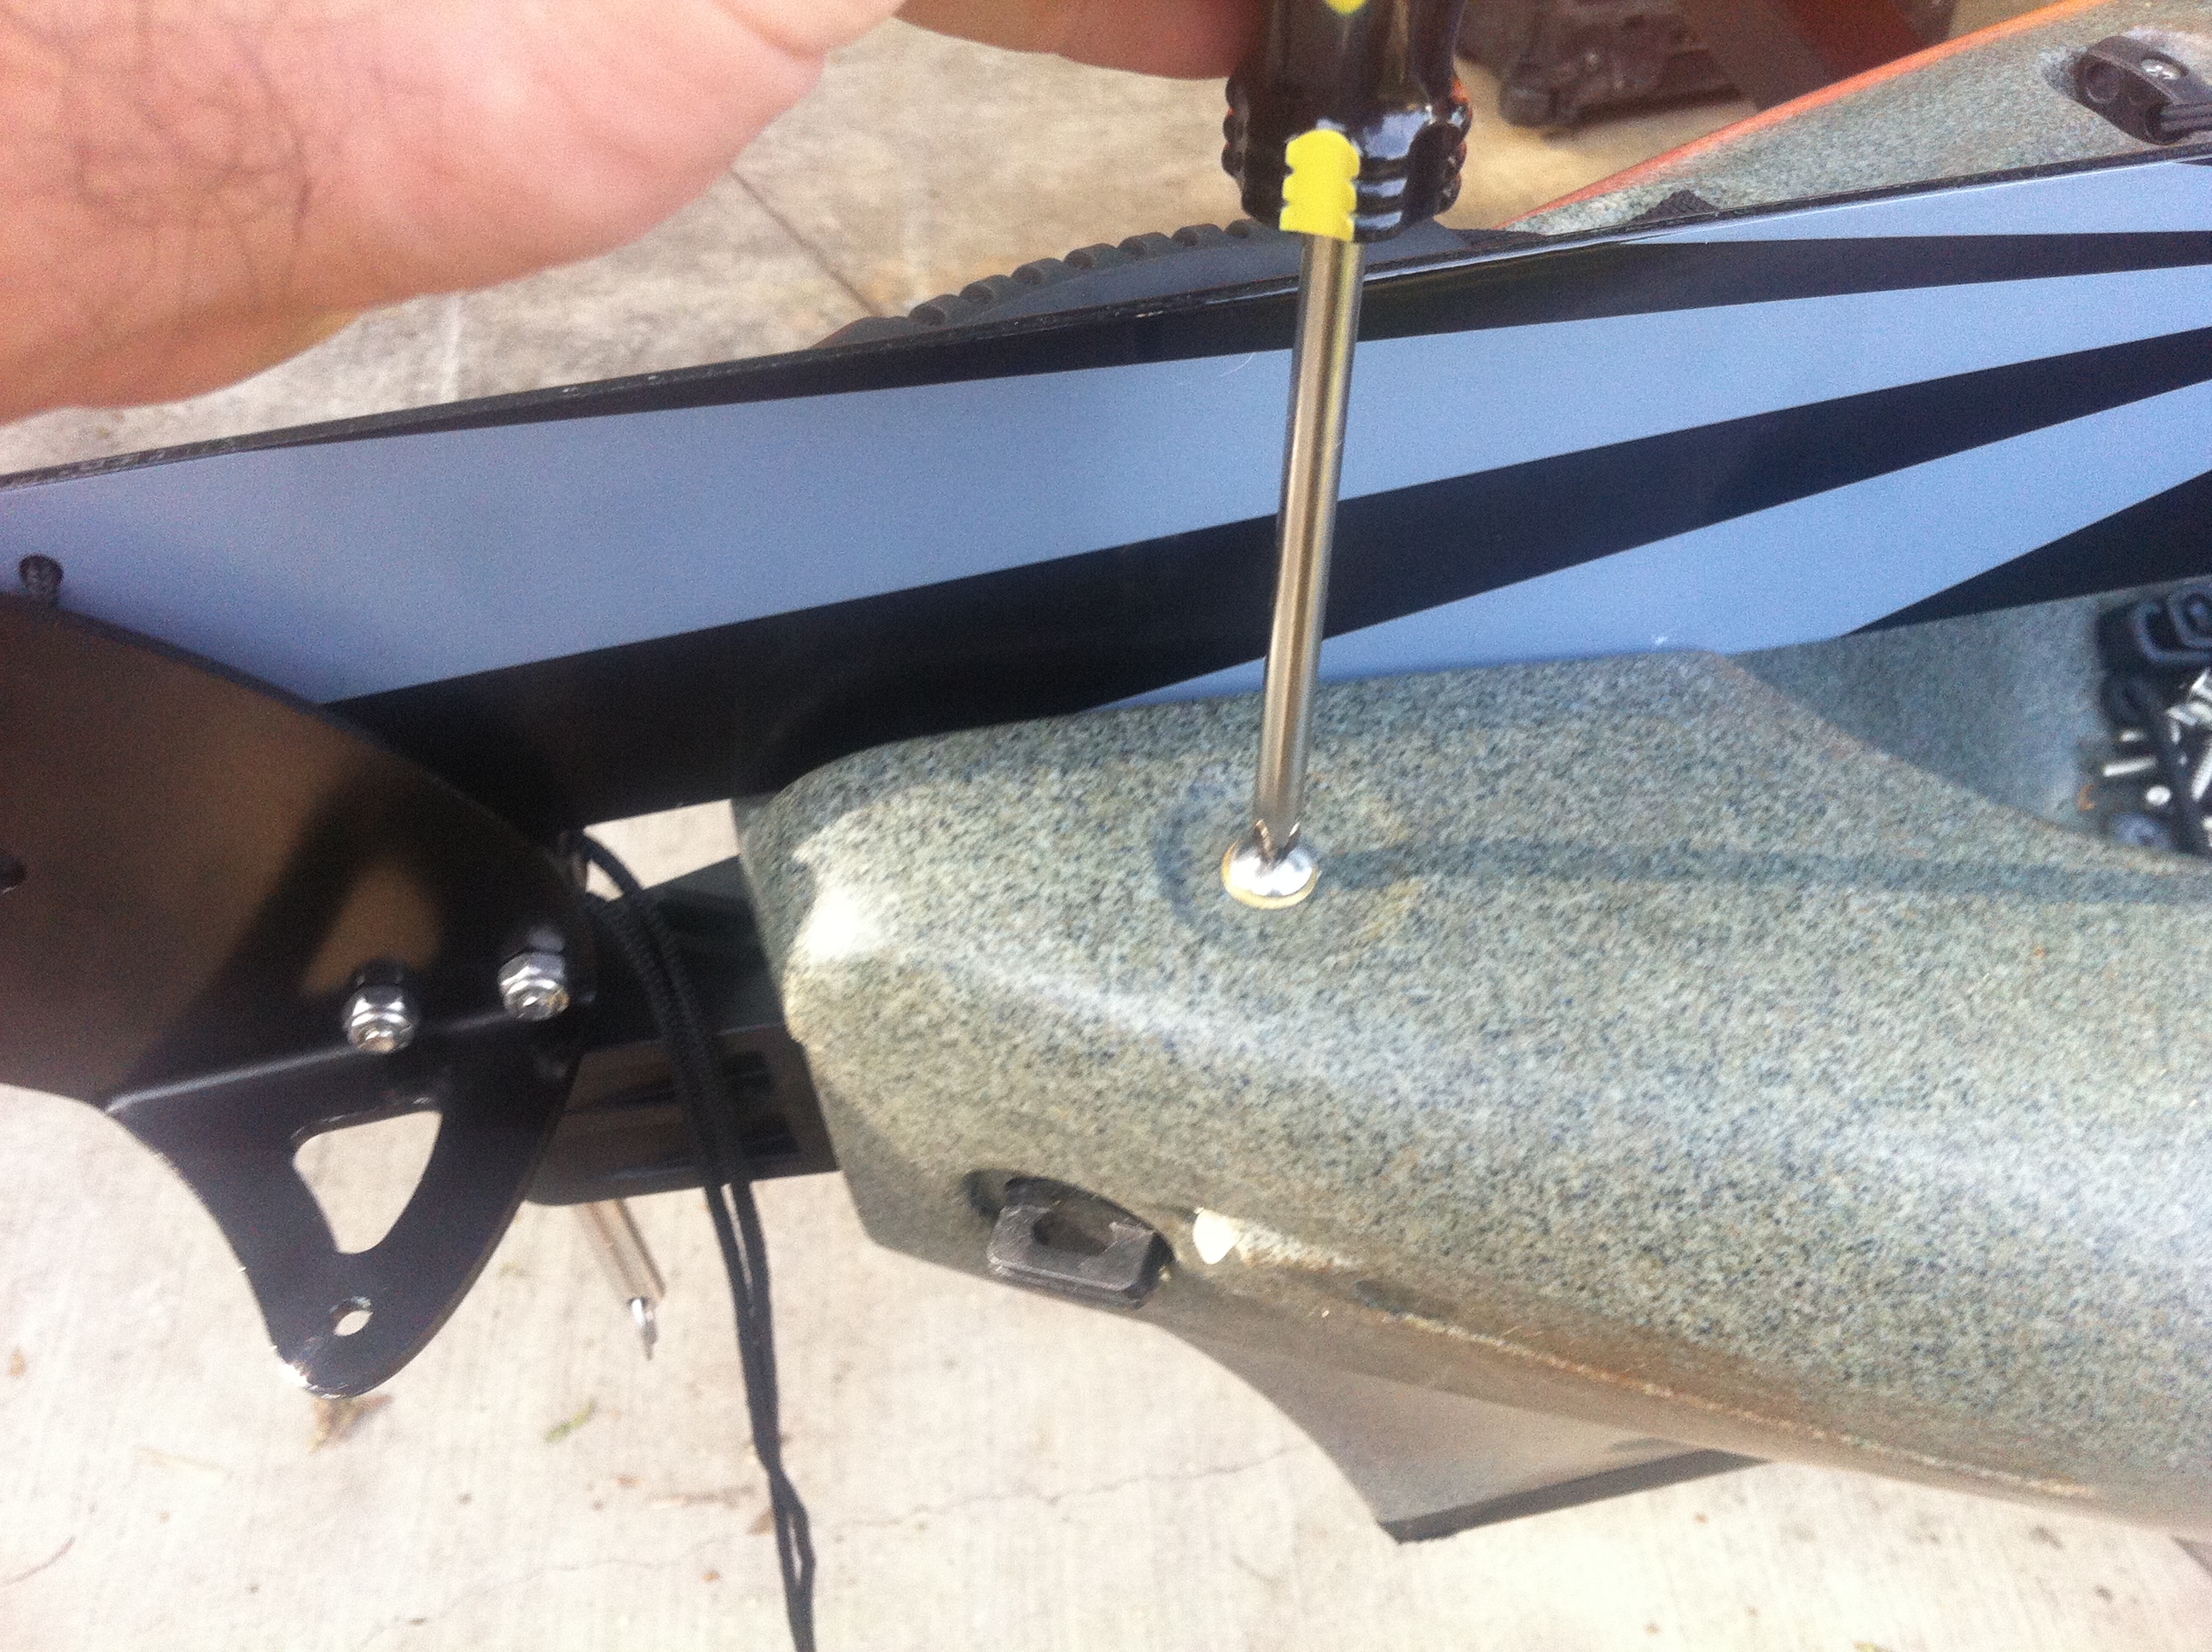
Step 7: Remove the screws from the predrilled eyelet locations.
Step 8: Loosely mount the eyelets and run the rudder position ropes through each, then tighten them down.
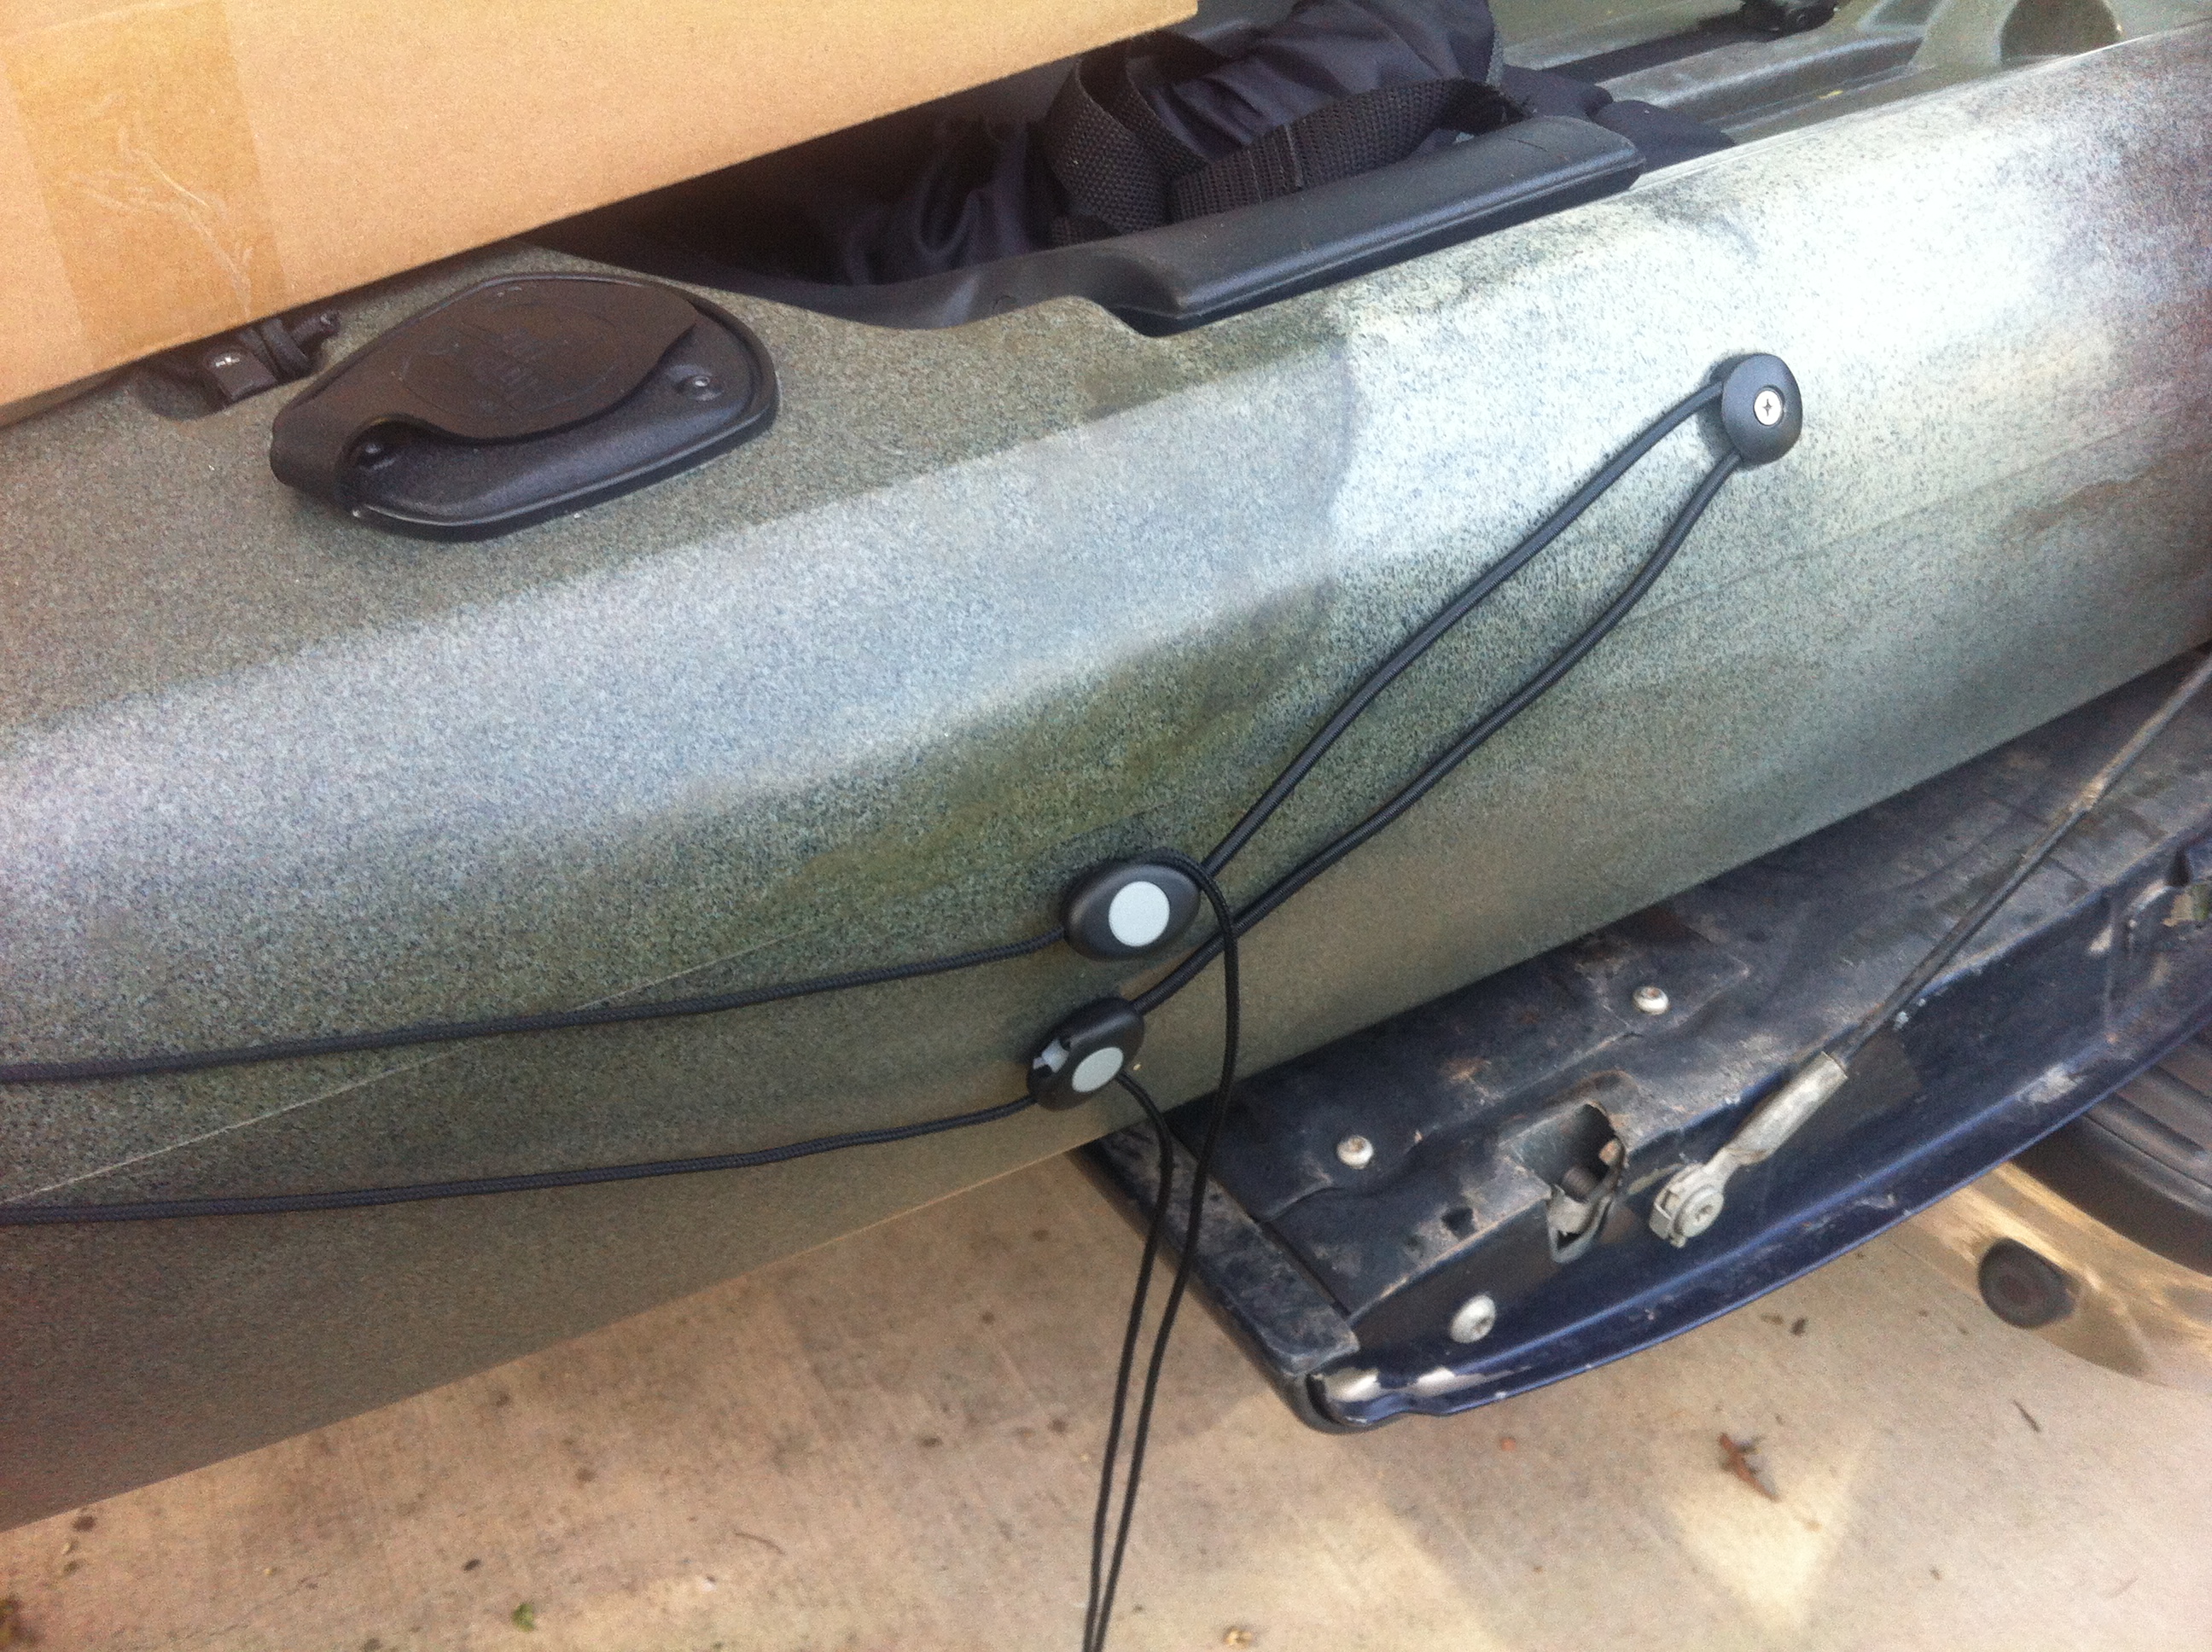
Step 9: Loop the bungee cord around the last eyelet and position the turtles.

Step 10: After positioning each turtle, tie a knot in the control rope and pull it taught.

Step 11: Thread the cable through the cable guides and position them by the rudder with the smooth section of the eyelet facing up.
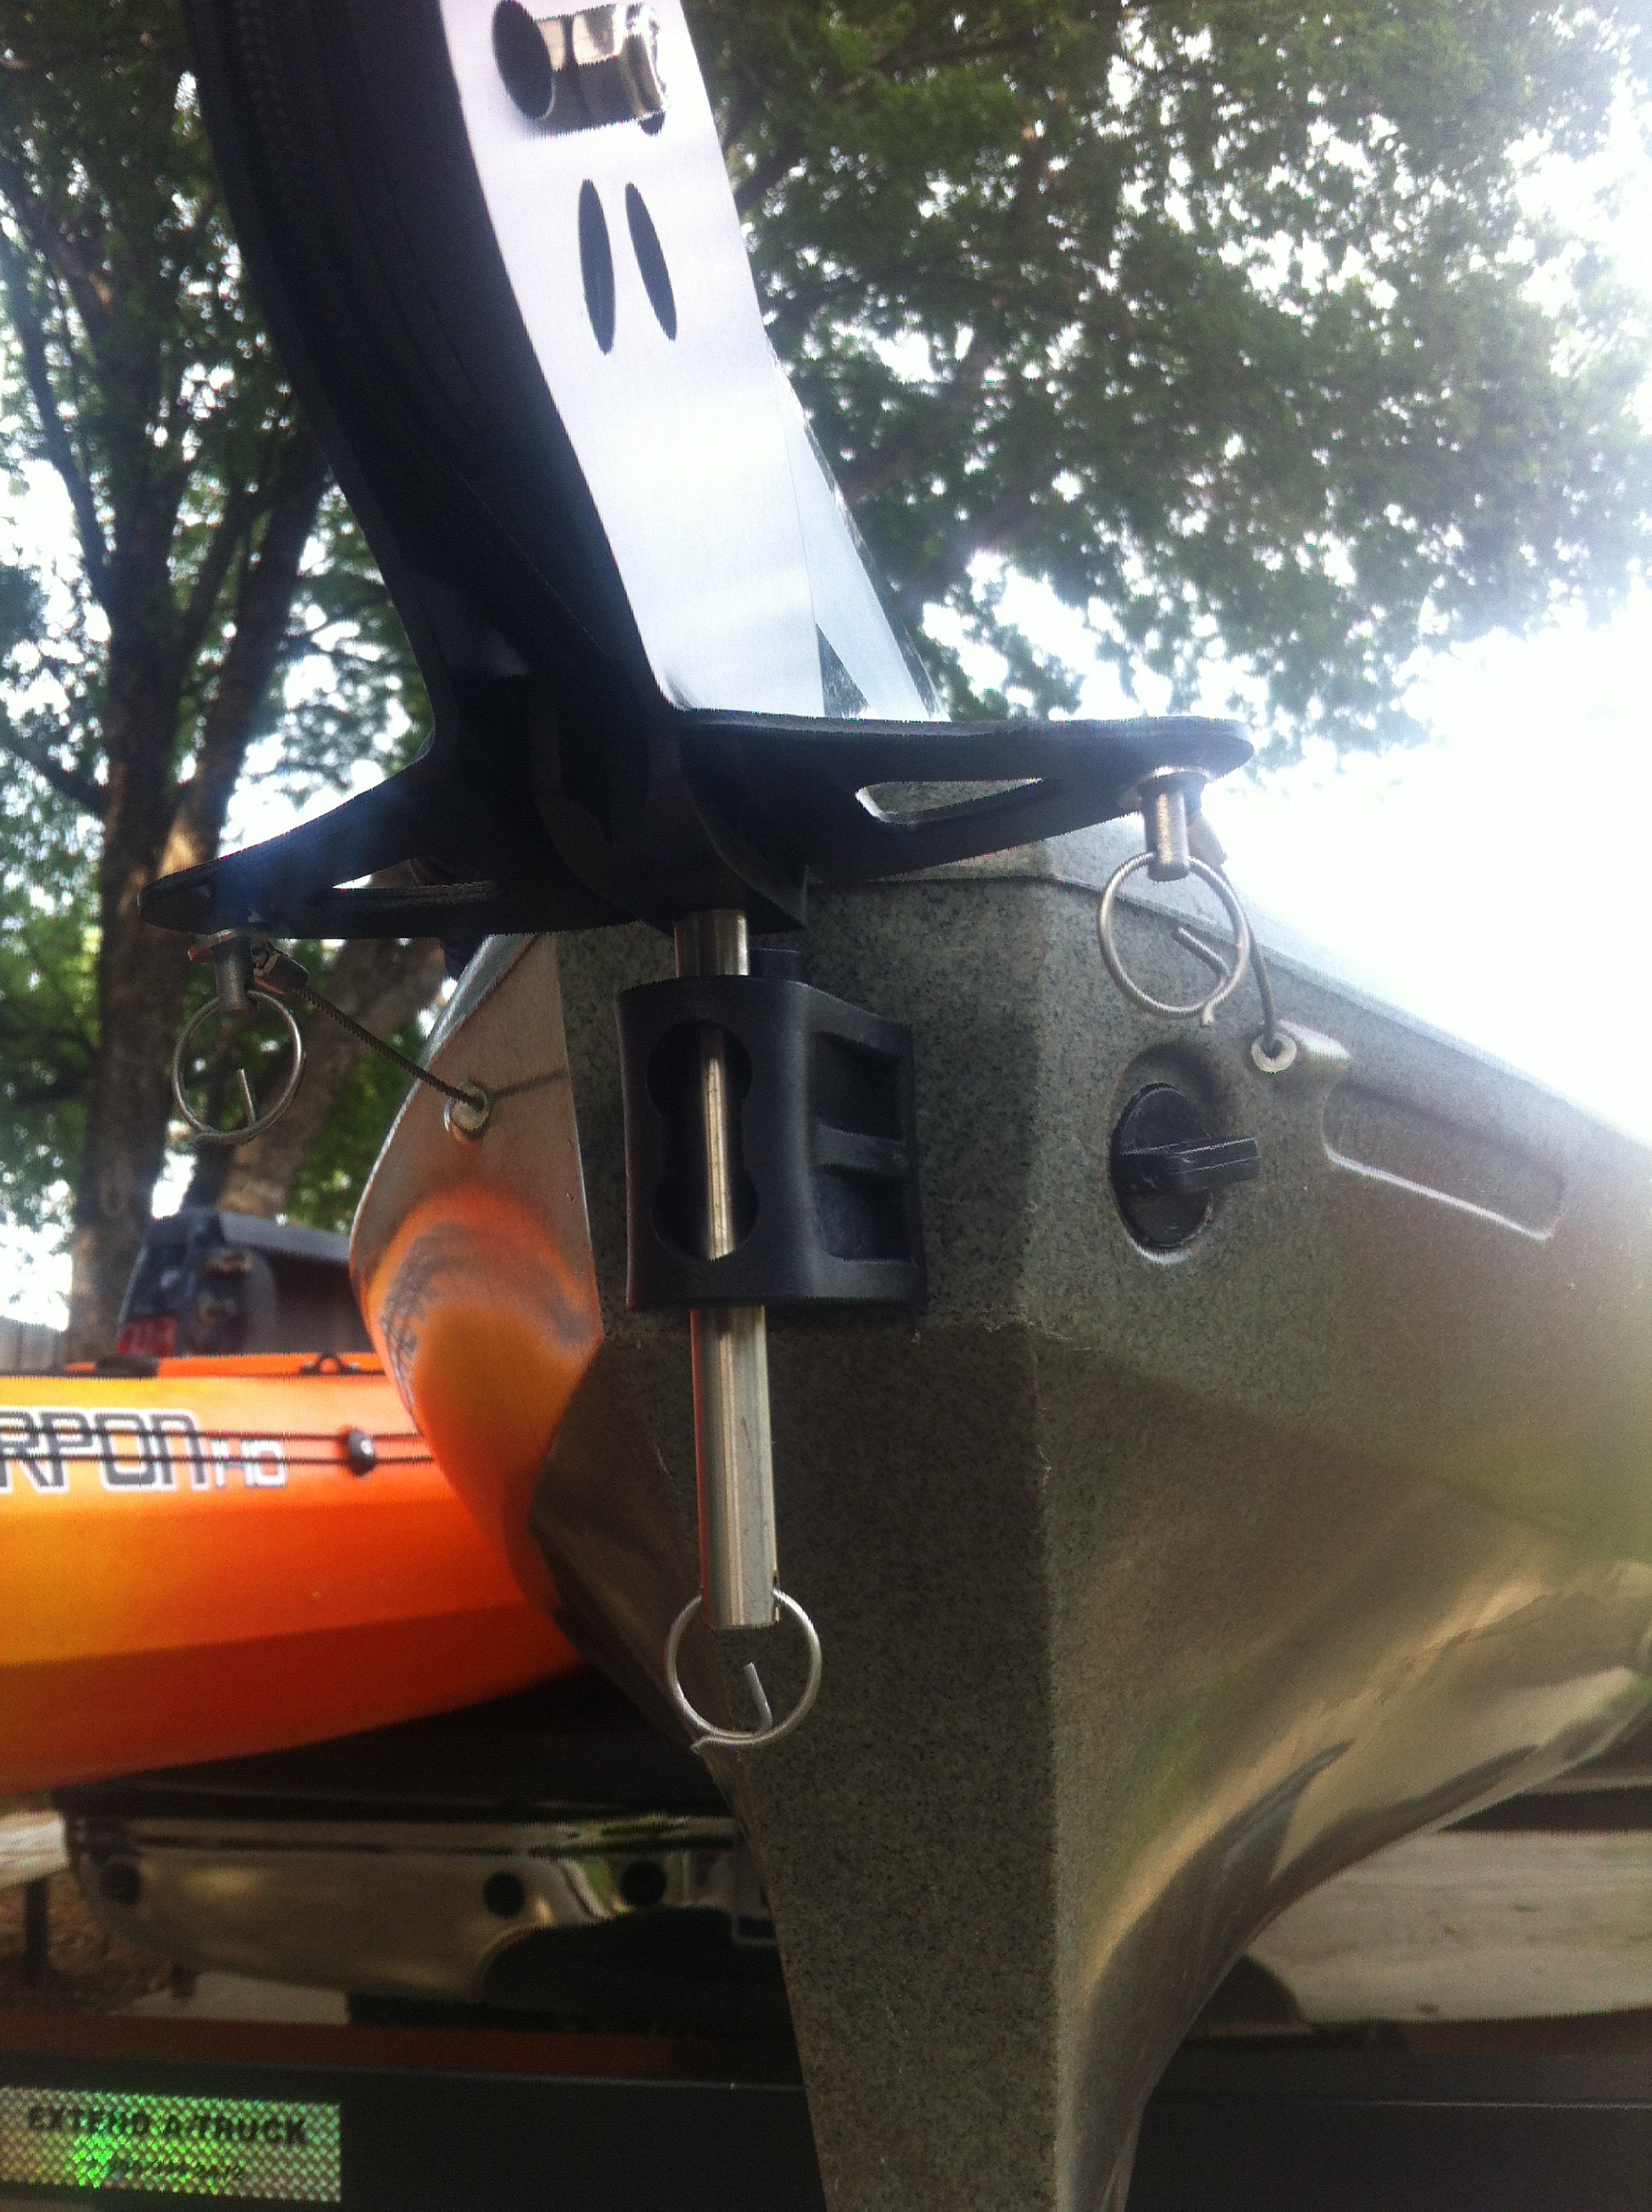
Step 12: Secure the cables with the rudder pins and clips.

Step 13: Remove the existing foot pegs. The holes shown in this photo are where the screws go through the body. There is a locknut and a rubber-washer on the inside of the hull that can be accessed using a pair of pliers (needle nose vise-grip work the best) or an appropriately sized socket (3/8″ I believe).
Step 14: View from inside the hull: on the top wou can see the bolts holding on the side rails. The bolts and holes for the side pedals are located on the left side of the adjoining bulkhead.
Step 15: Thread the bolts through the pedal rails and then through the holes in the hull. In this photo you can see the bolt, washer, and locknut that has been just threaded onto the bolt from this view inside of the hull.

Step 16: Thread the heatshrink tubing and two copper ferrules onto the cable. Next place the pedal into the metal pedal rail and then thread the cable through the pedal cable.
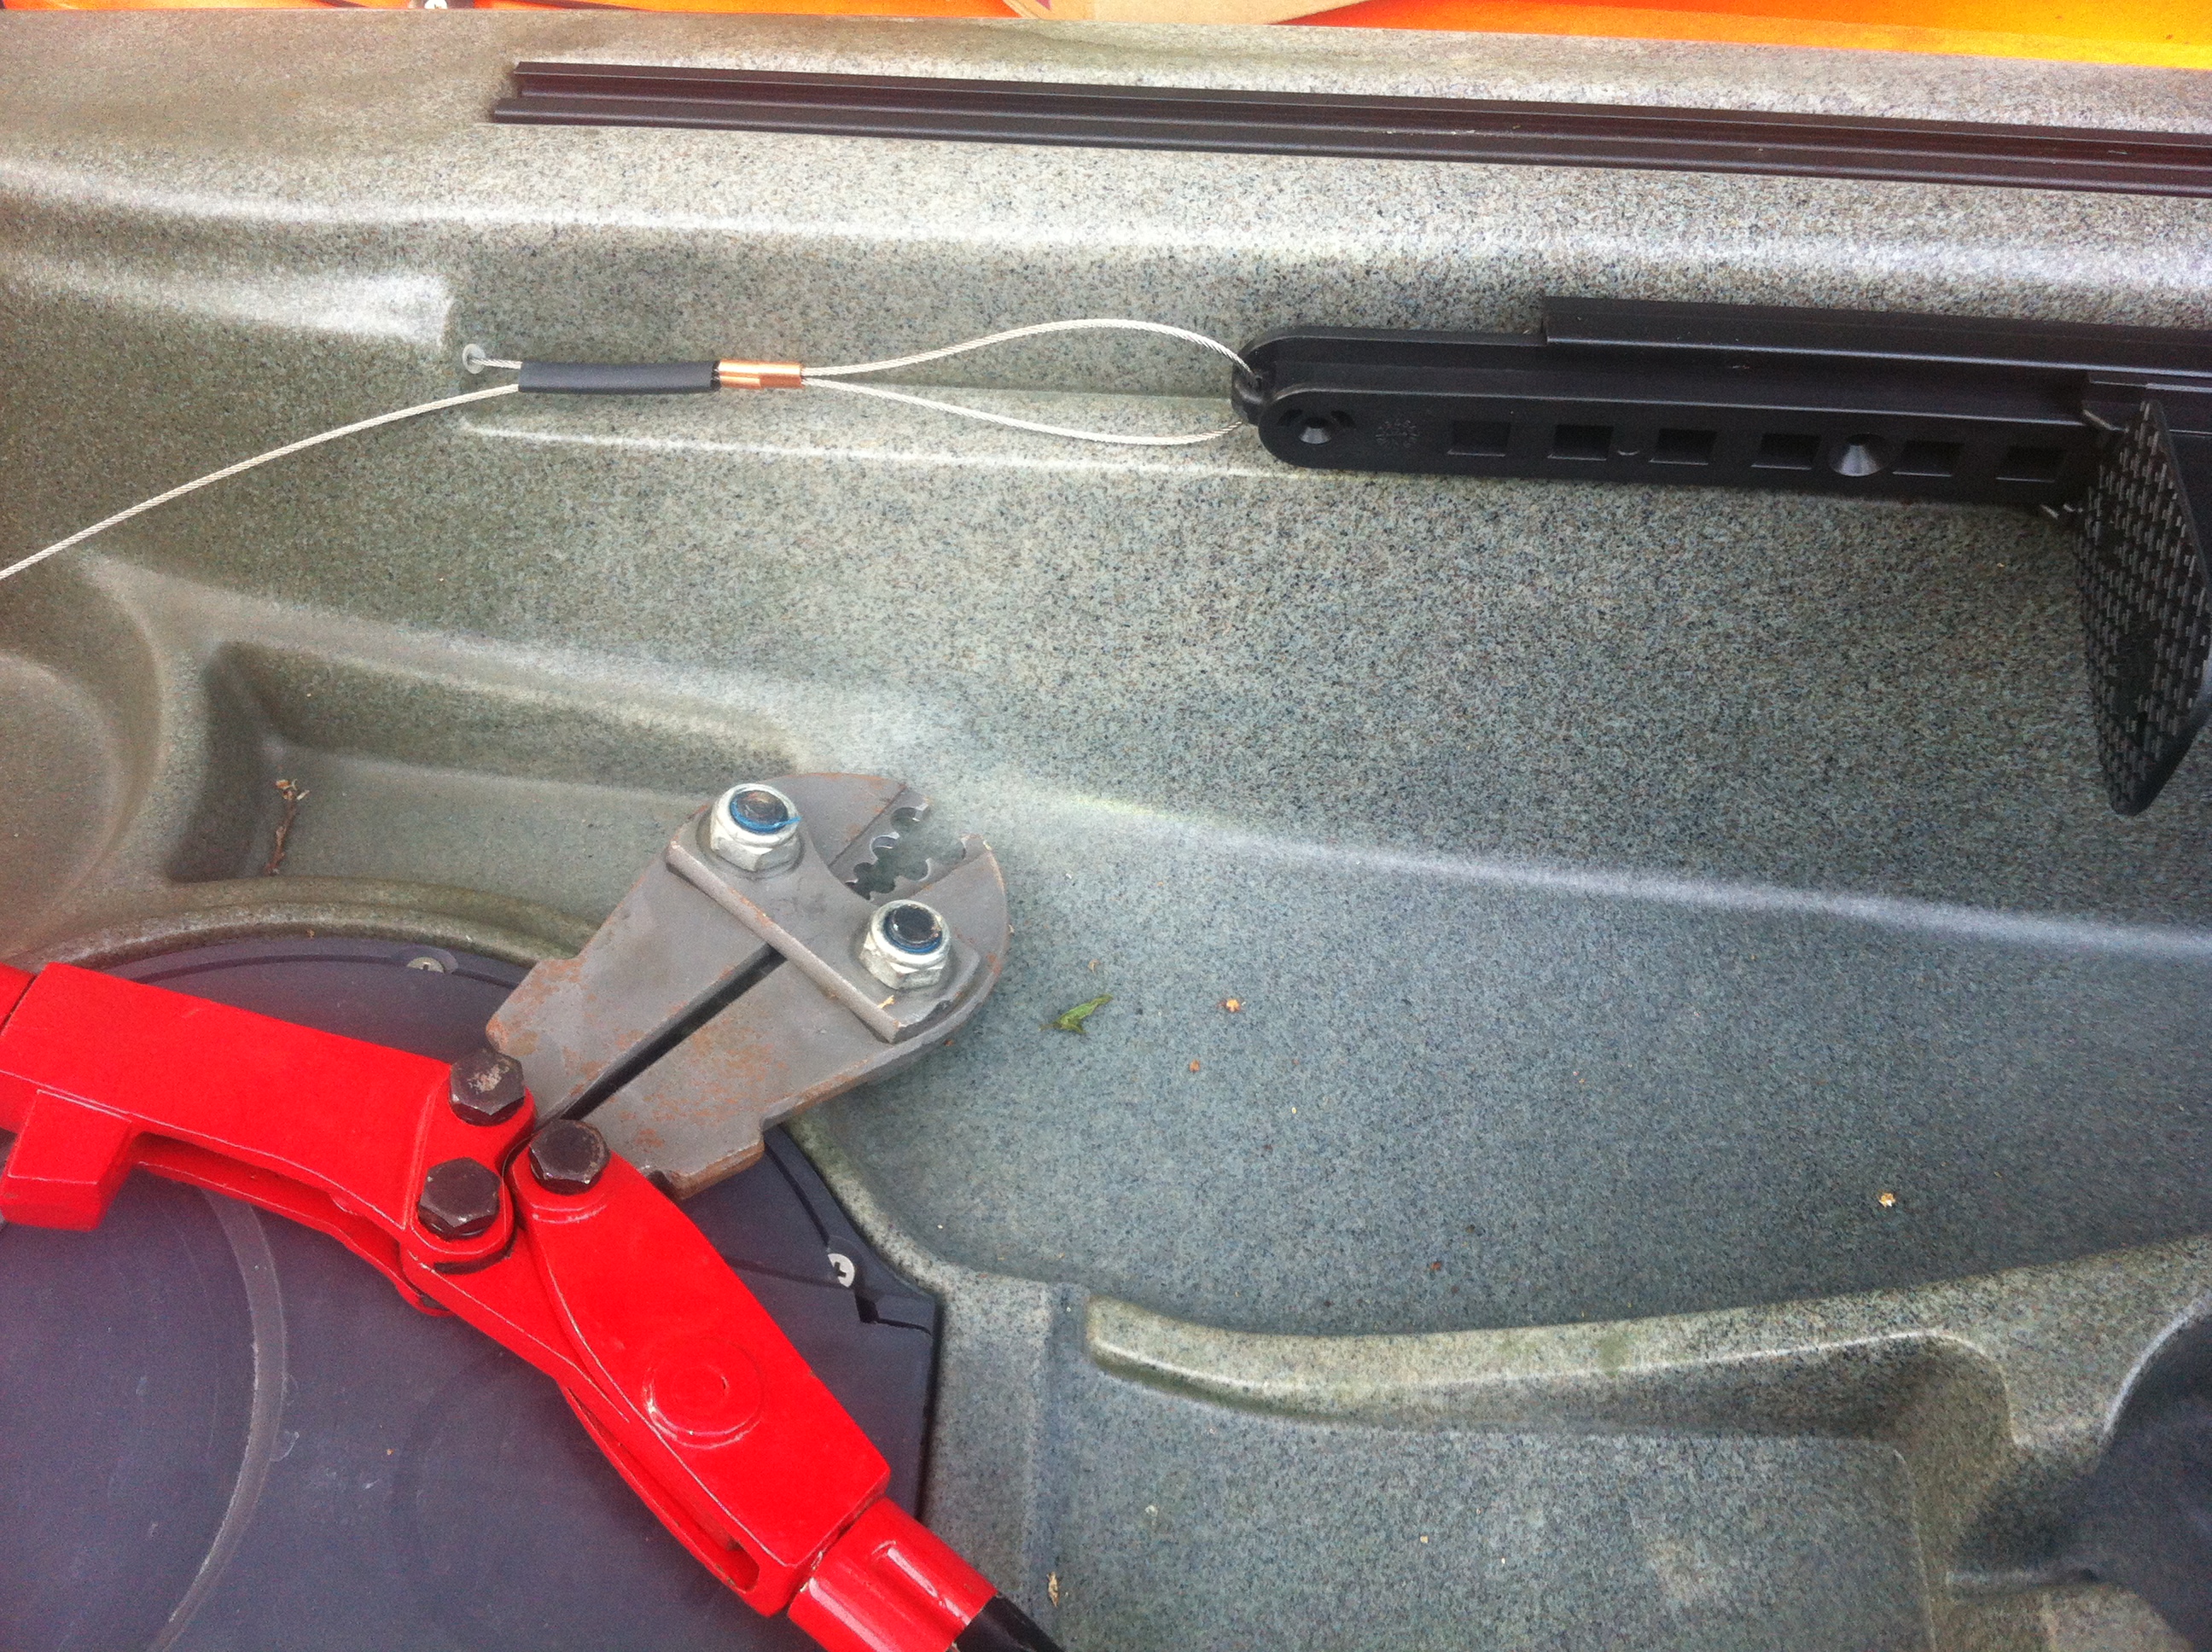
Step 17: Thread the cables back through the ferrules and heatshrink tubing. POSITION YOUR PEDAL CORRECTLY FIRST SO THAT YOU GET FULL RUDDER THROW. Then use your swager (you DO have a swager, don’t you?) to crimp the ferrules onto the cables.
Step 18: After you have crimped the ferrules, trim your excess cable.
Step 19: Slide the heatshrink tubing over the ferrules and excess cable and shrink it down by moving a flame from a lighter quickly over the surface.
Test out your new rudder system!